Dado Cuts vs. Grooves: Understanding the Difference

Dado Cuts vs. Grooves: Understanding the Difference

Dado Cuts vs. Grooves: Understanding the Difference

In the realm of woodworking, precision and accuracy are paramount. Achieving these goals often relies on the proper execution of cuts and grooves. Two frequently encountered terms that may seem synonymous, yet hold distinct meanings, are dado cuts and grooves. This article aims to clarify the differences between these two woodworking techniques, exploring their applications, advantages, and limitations.

Understanding Dado Cuts

A dado cut, also known as a dado joint, is a rectangular groove or slot cut across the width of a piece of wood. It is typically used to accommodate the thickness of another piece of wood, creating a strong and secure joint. The depth of a dado cut is designed to match the thickness of the material being inserted, ensuring a tight fit.

Types of Dado Cuts

Dado cuts can be classified into several types, each serving a specific purpose:

  • Through Dado: This type of dado cut extends completely through the width of the wood, creating a channel for inserting another piece of wood.
  • Stopped Dado: As the name suggests, a stopped dado cut is stopped before reaching the end of the wood, creating a groove with a defined length. This is particularly useful for creating shelves or other structural elements within a larger piece of wood.
  • Blind Dado: In a blind dado cut, the groove is made without completely passing through the wood, creating a concealed joint. This type of cut is often used for creating drawers or other hidden features.

Applications of Dado Cuts

Dado cuts find widespread application in various woodworking projects, including:

  • Cabinet Construction: Dado cuts are essential for creating strong and stable joints in cabinet construction, especially for shelves, drawer sides, and back panels.
  • Furniture Making: Dado joints are commonly used in furniture construction to create sturdy and aesthetically pleasing joints for legs, drawers, and other components.
  • Picture Frames: Dado cuts can be utilized to create picture frame rabbets, which provide a recess for the glass and artwork.
  • Moulding Applications: Dado cuts can be employed to create slots for installing moulding or trim, enhancing the visual appeal and functionality of a project.

Exploring Grooves

In contrast to dado cuts, a groove refers to a linear indentation or channel cut into the surface of wood, typically running along the grain. Unlike dados, grooves are usually narrower and shallower, serving a variety of purposes. Grooves are often used to create a decorative effect, provide a channel for routing cables, or create a smooth surface for sliding objects.

Types of Grooves

Grooves can be classified into different types based on their shape and purpose:

  • Rabbet Groove: A rabbet groove is a rectangular groove cut along the edge of a piece of wood, typically used for creating a joint for joining two pieces of wood at a right angle.
  • Bead Groove: A bead groove features a rounded or semi-circular profile, often used for decorative purposes or to create a channel for sliding a door.
  • Tongue and Groove Joint: This type of groove involves cutting a protruding tongue on one piece of wood and a corresponding groove on another piece. When joined, the tongue fits into the groove, creating a tight and strong connection.

Applications of Grooves

Grooves are widely used in various woodworking projects, including:

  • Flooring Installation: Tongue and groove joints are a standard feature in flooring installation, allowing for the seamless connection of individual boards.
  • Paneling: Grooves are often incorporated into paneling to create a visually appealing and cohesive design, while also providing a space for running wires or cables.
  • Door and Window Frames: Grooves are commonly used to create channels for installing glazing beads or weather stripping in door and window frames.
  • Furniture Design: Grooves can be used to create decorative details in furniture, such as chair rails, table legs, or drawer fronts.

Key Differences Between Dado Cuts and Grooves

While both dado cuts and grooves involve cutting channels into wood, they differ significantly in their shape, size, and purpose. Here's a breakdown of the key distinctions:

  • Shape: Dado cuts are rectangular grooves, while grooves can be rectangular, rounded, or have other profiles.
  • Size: Dado cuts are typically wider and deeper than grooves, designed to accommodate the thickness of another piece of wood.
  • Purpose: Dado cuts primarily serve as joints for connecting pieces of wood, while grooves are more versatile, used for decorative elements, cable routing, or creating sliding surfaces.

Tools for Creating Dado Cuts and Grooves

Both dado cuts and grooves can be created using a variety of tools, depending on the project requirements and the level of precision desired. Some common tools include:

  • Table Saw: A table saw equipped with a dado blade is ideal for creating dado cuts, especially for large or precise projects.
  • Router: A router can be used to create dado cuts and a wide range of grooves by using various router bits.
  • Hand Router: A hand router offers greater flexibility for creating dado cuts and grooves in awkward or tight spaces.
  • Dado Stack: A dado stack is a set of stacked blades designed specifically for cutting dado cuts on a table saw.
  • Groove Cutter: A groove cutter is a specialized router bit designed to create grooves with a specific profile.

Advantages and Limitations of Dado Cuts and Grooves

Both dado cuts and grooves have their own advantages and limitations, depending on the specific application. Understanding these aspects can help you choose the best technique for your project.

Advantages of Dado Cuts

  • Strong and Secure Joint: Dado cuts create a strong and secure joint, especially when used in cabinet construction or furniture making.
  • Aesthetically Pleasing: Dado joints can enhance the visual appeal of a project, providing a clean and professional look.
  • Versatility: Dado cuts can be used for a wide range of applications, from creating shelves to installing molding.

Limitations of Dado Cuts

  • Requires Specialized Tools: Creating dado cuts often requires specialized tools like a table saw or dado stack, which can be expensive.
  • Can be Time-Consuming: Depending on the size and complexity of the dado cut, creating it can be time-consuming.
  • Potential for Tear-Out: If not done properly, dado cuts can result in tear-out, especially in soft woods.

Advantages of Grooves

  • Versatility: Grooves can be used for a wide range of applications, from decorative elements to cable routing.
  • Easy to Create: Grooves can be created using various tools, including routers, hand routers, and groove cutters.
  • Aesthetic Appeal: Grooves can add visual interest to a project, enhancing its overall design.

Limitations of Grooves

  • May Not Be As Strong as Dado Cuts: Grooves are typically not as strong as dado cuts, especially for structural applications.
  • Limited Depth: Grooves are generally shallower than dado cuts, limiting their ability to accommodate thick pieces of wood.
  • Can Be Difficult to Cut Precisely: Creating a groove with a consistent depth and profile can be challenging for beginners.

Conclusion

In summary, dado cuts and grooves are distinct woodworking techniques that serve different purposes. Dado cuts create rectangular grooves for creating strong joints, while grooves can be rectangular, rounded, or have other profiles and serve a variety of applications, including decoration, cable routing, and sliding surfaces. Understanding the advantages and limitations of each technique allows you to choose the most suitable method for your woodworking project. By mastering these techniques, you can achieve the desired precision and create stunning and functional woodworking projects.

How to Make Functional and Beautiful Wooden Plant Stands for Homeowners

How to Make Functional and Beautiful Wooden Plant Stands for Homeowners

Elevate Your Greenery: Crafting Functional & Beautiful Wooden Plant Stands

Breathe life into your home with the vibrant presence of plants, and enhance their charm with custom-crafted wooden plant stands. These creations are more than just a place to rest your pots; they're a statement of your style, a testament to your DIY skills, and an opportunity to bring warmth and personality to your living spaces.

Choosing the Right Wood

The journey begins with selecting the perfect wood. Consider the aesthetic and practical aspects:

Durability and Strength

Opt for hardwoods like oak, maple, or walnut for their resilience and ability to withstand the weight of larger plants. These woods offer natural beauty and a timeless elegance.

Aesthetic Appeal

Softwoods like pine or cedar provide a lighter, more rustic charm. Their lighter hues and natural knots can complement certain décor styles. Remember, you can always stain or paint the wood to match your desired aesthetic.

Designing Your Plant Stand

The next step is to unleash your creativity. Sketch out your vision, considering:

Shape and Size

Think about the space you're working with and the size of your plants. A single-tier stand might be perfect for a small succulent, while a multi-tier design can showcase a collection of plants.

Style and Features

Do you prefer a simple, minimalist design or something more elaborate with curves and intricate details? Consider adding shelves, drawers, or even wheels for mobility.

The Building Process

Armed with your design and chosen wood, gather the necessary tools:

  • Saw (circular, jigsaw, or handsaw)
  • Drill and drill bits
  • Screwdriver or impact driver
  • Sandpaper (various grits)
  • Measuring tape and pencil
  • Clamps (optional)
  • Wood glue (optional)
  • Finishing materials (stain, paint, sealant)

Follow these steps:

Cutting and Shaping

Use your saw to cut the wood into the required dimensions based on your design. Ensure clean and accurate cuts for a professional finish.

Assembly

Assemble the pieces using wood glue and screws, ensuring all joints are secure. Clamps can help hold pieces together while the glue dries.

Sanding

Smooth out any rough edges and imperfections using sandpaper. Start with coarser grits and progressively move to finer grits for a smooth surface.

Finishing Touches

Enhance the beauty of your plant stand with stain, paint, or sealant. Choose finishes that complement your home décor and protect the wood from moisture and wear.

Adding Personal Flair

Don't be afraid to add your own personality. Here are some ideas:

  • Carve intricate designs or add decorative elements like metal accents.
  • Paint the stand in vibrant colors or apply a rustic, weathered finish.
  • Embellish the stand with decorative knobs, handles, or even upcycled materials.

Your handcrafted wooden plant stands will not only showcase your green companions but also serve as beautiful and functional additions to your home, reflecting your unique taste and craftsmanship.

Easy Woodworking Projects for Beginners with Step-by-Step Instructions

Easy Woodworking Projects for Beginners with Step-by-Step Instructions

Easy Woodworking Projects for Beginners with Step-by-Step Instructions

Woodworking is a rewarding hobby that offers a sense of accomplishment and the opportunity to create beautiful and functional pieces. If you're a beginner, starting with simple projects is key to building your skills and confidence. This guide will provide you with step-by-step instructions for several easy woodworking projects that are perfect for beginners.

Essential Tools and Materials

Before embarking on any woodworking project, it's crucial to have the necessary tools and materials. While the specific tools may vary depending on the project, here's a basic set that will get you started:

  • Measuring Tape: Essential for accurate measurements.
  • Pencil: For marking lines and transferring measurements.
  • Hand Saw: Used for cutting wood to size.
  • Hammer: For driving nails and securing pieces together.
  • Screwdriver: To fasten screws.
  • Wood Glue: Used for bonding wood pieces.
  • Safety Glasses: To protect your eyes from flying debris.
  • Work Gloves: To protect your hands.
  • Clamps: To hold pieces together while they are being glued or screwed.
  • Sandpaper: For smoothing surfaces and removing imperfections.

In addition to these essential tools, you'll need to select the appropriate wood for your project. Pine, plywood, and MDF are common choices for beginners due to their affordability and ease of workability.

Simple Woodworking Projects for Beginners

1. Wooden Coasters

Wooden coasters are a practical and stylish addition to any home. This project is simple and allows you to practice basic woodworking techniques.

  1. Cut the Wood: Using a handsaw or a circular saw, cut 4-inch square pieces from your chosen wood. You'll need as many pieces as you want coasters.
  2. Sand the Edges: Smooth the edges of the squares using sandpaper. Start with coarse-grit sandpaper and finish with fine-grit for a smooth finish.
  3. Apply Finish (Optional): You can stain or paint the coasters for a personalized touch. If you prefer a natural look, apply a sealant to protect the wood.
  4. Attach Felt Pads: Use wood glue or adhesive to attach felt pads to the bottom of each coaster. These will prevent scratches on your surfaces.

2. Simple Picture Frame

A picture frame is a classic woodworking project that allows you to showcase your favorite photos or artwork.

  1. Measure and Cut the Wood: Measure the dimensions of your photo or artwork. Cut four pieces of wood to create the frame's perimeter, allowing for a slight overlap at the corners.
  2. Join the Corners: Use wood glue and clamps to join the four pieces of wood at the corners, ensuring they are square and flush.
  3. Secure the Joints: Once the glue has dried, reinforce the corners by driving nails or screws through the mitered joints.
  4. Sand and Finish: Sand the frame to remove any rough edges. Apply a stain or paint to personalize the frame.
  5. Attach the Back: Cut a piece of plywood or cardboard to fit inside the frame. Use glue or small nails to attach the back panel.
  6. Install Hardware: Attach picture-hanging hardware to the back of the frame.

3. Wooden Cutting Board

A wooden cutting board is a useful addition to any kitchen. This project requires a bit more work but is still manageable for beginners.

  1. Select and Cut the Wood: Choose a hardwood such as maple or walnut for its durability. Cut the wood to your desired size and shape. If you want a rectangular board, use a handsaw or circular saw. For a more intricate shape, consider using a jigsaw.
  2. Sand the Surface: Sand the surface of the cutting board thoroughly. Start with coarse-grit sandpaper and work your way to fine-grit to achieve a smooth finish.
  3. Apply Mineral Oil (Optional): Mineral oil is a common sealant for cutting boards. Apply it liberally to the surface and allow it to dry for several hours. Repeat this process as needed.
  4. Add a Handle (Optional): For a more comfortable grip, you can attach a wooden handle to the cutting board. Use wood glue and clamps to secure the handle.

4. Wooden Birdhouse

Building a birdhouse is a fun and rewarding project for beginners. It's an excellent opportunity to work with different wood shapes and learn about basic construction techniques.

  1. Choose a Design: There are countless birdhouse designs online and in books. Select one that appeals to you and is appropriate for the birds in your area.
  2. Cut the Wood: Cut the wood pieces according to the design specifications. Use a handsaw, jigsaw, or scroll saw for intricate cuts.
  3. Assemble the Birdhouse: Use wood glue and nails or screws to assemble the various components of the birdhouse. Make sure to create a snug fit to keep out rain and drafts.
  4. Add the Roof: Attach the roof using glue, nails, or screws. You may want to use hinges to create a removable roof for easy cleaning.
  5. Install a Perch and Entrance Hole: Attach a wooden perch and drill the entrance hole according to the design specifications.
  6. Paint or Stain (Optional): Paint or stain the birdhouse for a more attractive look. Use non-toxic paints or stains that are safe for birds.

Tips for Success

Woodworking can be an enjoyable hobby, but it's important to approach it with safety and patience.

  • Read the Instructions Carefully: Before you start any project, make sure you understand the steps and materials required. Read the instructions thoroughly and refer to them frequently.
  • Start Small: Begin with simple projects and gradually move on to more complex ones as you gain confidence.
  • Practice Safety: Always wear safety glasses and gloves when working with woodworking tools. Use caution and follow proper safety guidelines to avoid injuries.
  • Take Your Time: Woodworking is a craft that requires patience and precision. Don't rush the process and allow adequate time for each step.
  • Don't Be Afraid to Ask for Help: If you encounter difficulties, don't hesitate to ask for help from a more experienced woodworker or consult online resources.

Conclusion

Woodworking is a rewarding and creative hobby that can be enjoyed by people of all ages and skill levels. With these easy woodworking projects, you can unleash your inner craftsman and create beautiful and functional pieces for yourself or as gifts for others. Remember to start small, practice safety, and have fun along the way.

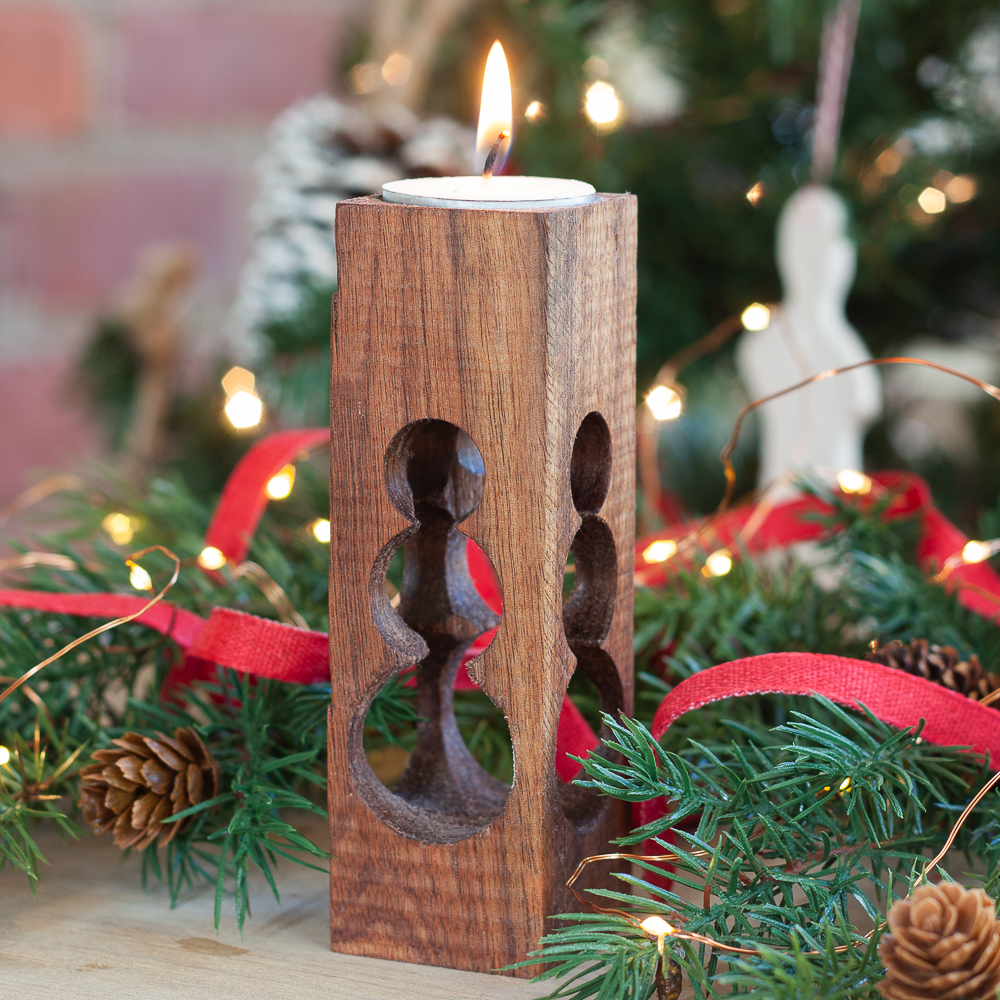
How to Make Wooden Candle Holders with an Industrial Feel

How to Make Wooden Candle Holders with an Industrial Feel

Crafting Industrial Chic: A Guide to Making Wooden Candle Holders

In the realm of home decor, the industrial aesthetic has emerged as a timeless trend, characterized by its raw, utilitarian beauty and a touch of rugged charm. Wooden candle holders, with their inherent warmth and natural appeal, can be seamlessly integrated into this style, adding a touch of sophistication and ambiance to any space. This comprehensive guide will equip you with the knowledge and techniques to create your own industrial-inspired wooden candle holders, transforming ordinary wood into captivating home accents.

Materials and Tools

Before embarking on your crafting journey, gather the necessary materials and tools. This will ensure a smooth and efficient process:

Materials:

  • Wooden blocks or planks: Choose wood with a rustic or reclaimed look, such as reclaimed barn wood, pine, or oak. The thickness of the wood should be sufficient to accommodate the candle size.
  • Candles: Select candles that complement the size and style of your wooden holders. Consider varying heights and diameters to add visual interest.
  • Wood glue:
  • Sandpaper: Use different grits, from coarse to fine, to smooth the wood and create a desired finish.
  • Wood stain or paint: Select colors that align with the industrial aesthetic, such as dark browns, grays, or metallics. Consider using a clear sealant for a protective finish.
  • Metal hardware: Industrial-inspired hardware such as screws, bolts, washers, or brackets can add a touch of authenticity and visual interest.
  • Protective gloves and safety goggles:

Tools:

  • Saw: A handsaw, jigsaw, or circular saw for cutting the wood to desired dimensions.
  • Drill: For creating holes for candles and attaching hardware.
  • Clamps: To secure the wood during cutting or gluing.
  • Measuring tape and pencil: For marking and precise cutting.
  • Hammer: For securing hardware.
  • Paintbrushes or rags: For applying stain or paint.

Step-by-Step Guide: Creating Your Industrial Wooden Candle Holders

Follow these step-by-step instructions to craft your unique industrial wooden candle holders:

Step 1: Design and Preparation

Begin by visualizing the design of your candle holders. Consider factors such as the shape, size, and number of holders you want to create. Sketch out your ideas and measure the dimensions of your chosen wooden blocks or planks. Ensure that the dimensions are compatible with the size of your candles.

Step 2: Cutting and Shaping

Using your chosen saw, carefully cut the wooden blocks or planks to the desired size and shape. For a more rustic and industrial look, consider leaving some natural edges or imperfections. If creating multiple holders, ensure consistency in their dimensions.

Step 3: Sanding and Finishing

Once you have cut and shaped the wood, it's time to smooth the surface with sandpaper. Start with a coarse grit to remove any rough edges or imperfections. Gradually progress to finer grits for a smoother finish. Consider using a sanding block for more control and a consistent finish.

Step 4: Creating Candle Wells

Use a drill with a bit slightly larger than the diameter of your candles to create holes for the candle wells. Be careful not to drill all the way through the wood. The depth of the hole should be slightly less than the height of the candle.

Step 5: Stain or Paint

Apply your chosen wood stain or paint to the wooden holders. Use a brush or rag to evenly distribute the stain or paint, allowing it to penetrate the wood. Consider applying multiple coats for a richer color and a more durable finish.

Step 6: Adding Hardware

Attaching metal hardware can add a touch of industrial charm and provide a secure base for your candle holders. Use your drill to create pilot holes for screws or bolts. Secure the hardware with a hammer and ensure a firm hold.

Step 7: Protective Finish

To enhance the durability and protect the finish of your candle holders, consider applying a clear sealant. This will prevent spills or water damage, ensuring that your creations remain beautiful for years to come.

Industrial Style Tips

To elevate the industrial feel of your wooden candle holders, consider incorporating these styling tips:

  • Reclaimed Wood: Utilize wood with a history, such as reclaimed barn wood, for an authentic industrial look. Its natural imperfections and weathered patina add character and depth.
  • Metallic Accents: Incorporate metallic hardware, such as screws, bolts, or brackets, for a rugged and industrial touch. Choose finishes like brushed nickel, brass, or copper to complement the wooden base.
  • Dark and Earthy Tones: Opt for dark wood stains or paints, such as dark browns, grays, or blacks, to create a moody and sophisticated ambiance.
  • Distressed Finish: Consider distressing the surface of the wood by lightly sanding or using a wire brush to create a worn and aged look.
  • Unusual Shapes: Explore unique shapes and forms for your candle holders, like asymmetrical designs or angular pieces. Experiment with different combinations of wood sizes and shapes to create visual interest.
  • Groupings and Arrangements: Arrange multiple candle holders of varying sizes and shapes together to create a captivating focal point. Groupings of three or five holders can create a visually striking and balanced display.

Conclusion

Creating industrial-inspired wooden candle holders is a rewarding and creative endeavor that allows you to infuse your home with a unique touch. By following the step-by-step guide and embracing the industrial style tips, you can transform ordinary wood into captivating home accents that exude both warmth and modern sophistication. Embrace your creativity and enjoy the process of crafting these beautiful and functional pieces that will enhance the ambiance of your space for years to come.

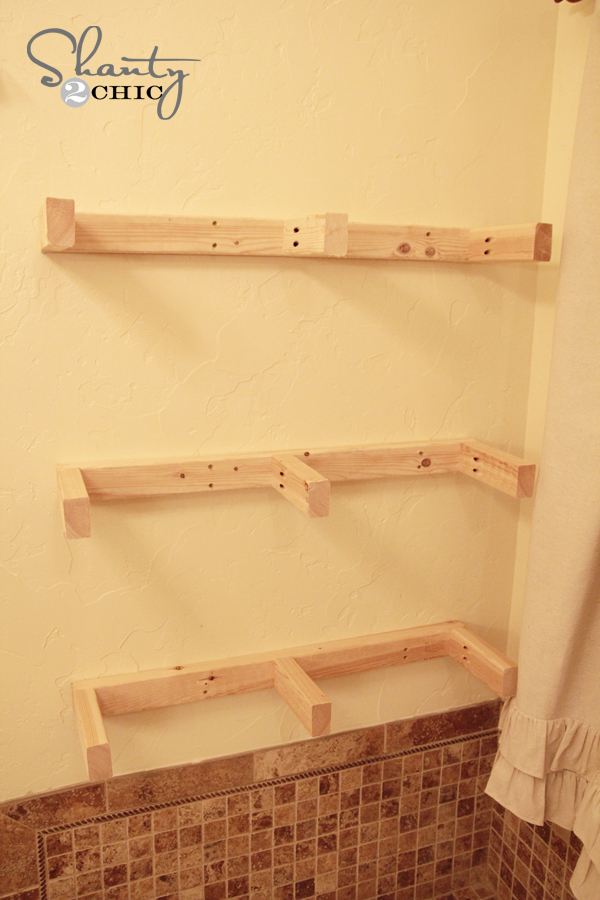
DIY Floating Shelves: How to Build and Customize Your Own Wall Storage

DIY Floating Shelves: How to Build and Customize Your Own Wall Storage

DIY Floating Shelves: How to Build and Customize Your Own Wall Storage

Tired of bulky bookshelves taking up precious floor space? Ready to elevate your home decor with a modern, minimalist touch? Then it's time to embark on a DIY adventure and build your own floating shelves! These stylish and functional storage solutions are easier to create than you might think, offering a fantastic way to personalize your space and showcase your favorite belongings.

This guide will walk you through the entire process, from choosing materials and planning your design to installing your masterpiece. Get ready to unleash your inner builder and transform your walls into stunning storage havens.

Planning Your Floating Shelf Project

Before you grab your tools and get sawing, it's crucial to plan your floating shelves. Consider these factors:

1. Determine Shelf Size and Number

Measure the space you want to fill and decide on the dimensions of your shelves. For smaller items like plants and photo frames, a 12-inch depth might suffice. For larger items like books or decorative pieces, you'll need a deeper shelf (18-24 inches). Consider the number of shelves you want and their placement to create a balanced and visually appealing design.

2. Choose Your Materials

The material you choose for your shelves will determine their style and weight capacity. Popular options include:

  • Wood: Durable, versatile, and available in various finishes. Pine and plywood are budget-friendly choices, while hardwoods like maple and oak offer greater strength and elegance.
  • Metal: Sleek and modern, offering a clean industrial aesthetic. Steel, iron, and aluminum are popular choices.
  • Glass: Adds a touch of sophistication and makes objects appear to float. Ensure you choose tempered glass for safety and strength.

3. Decide on Shelf Brackets

The brackets will hold the weight of your shelves and determine their overall appearance. Consider options like:

  • Metal L-brackets: Simple, affordable, and offer strong support.
  • Decorative Brackets: Add a touch of flair with ornate or industrial-style brackets.
  • Hidden Brackets: Create a clean, seamless look by concealing the brackets behind the shelves.

Gathering Your Tools and Materials

Once your plan is in place, gather your tools and materials. You'll need:

  • Saw: A circular saw or table saw for cutting the wood. A jigsaw can be used for intricate cuts.
  • Drill: With various drill bits, including countersinking bits for screws.
  • Screwdriver: For attaching brackets and securing the shelves.
  • Tape Measure: For precise measurements.
  • Level: To ensure your shelves are perfectly straight.
  • Pencil: For marking your cuts and placement.
  • Sandpaper: For smoothing out any rough edges.
  • Wood Glue: For extra support and stability (optional).
  • Wood Stain or Paint: To enhance the appearance and protect the wood.
  • Protective Gloves and Eyeglasses: For safety.

Building the Shelves

With your tools and materials ready, let's get building!

1. Cut the Wood

Using your tape measure, mark the desired length and width of your shelves on the wood. Make precise cuts with your chosen saw. Ensure the cuts are straight and clean.

2. Sand the Edges

Smooth out any rough edges or imperfections on the shelf surfaces and edges using sandpaper. Sand in the direction of the wood grain for the best results.

3. Stain or Paint (Optional)

If you want to enhance the appearance or protect the wood, apply a stain or paint. Choose a color that complements your decor. Let the finish dry completely before moving on.

Installing the Shelves

Now comes the fun part â€" installing your floating shelves!

1. Mark the Bracket Placement

Hold the brackets against the wall where you want to place the shelves. Use a pencil to mark the locations for the screws. Remember to consider the thickness of the shelf when marking the placement.

2. Drill Pilot Holes

Drill pilot holes at the marked locations for the screws. This will prevent the wood from splitting when you screw in the brackets.

3. Install the Brackets

Secure the brackets to the wall using screws. Use a level to ensure the brackets are straight and even. Drive the screws in firmly, but avoid overtightening.

4. Attach the Shelves

Carefully place the shelves on top of the installed brackets. Ensure they are level and properly aligned.

5. Secure the Shelves (Optional)

For added stability, you can optionally secure the shelves to the brackets using screws. This is especially recommended for heavier shelves.

Adding Finishing Touches

Your floating shelves are now ready to adorn your walls! Here are some final tips:

  • Arrange your belongings artfully. Consider the height and weight distribution of your items.
  • Use decorative boxes or baskets to conceal clutter.
  • Add lighting to highlight your shelves and create a dramatic effect.

Congratulations! You've now mastered the art of building and customizing your own floating shelves. Enjoy the satisfaction of transforming your space into a stylish and functional haven. With your newfound DIY skills, the possibilities are endless!

Build Your Own Bedside Cabinet with These Free PDF Guides

Build Your Own Bedside Cabinet with These Free PDF Guides

Build Your Own Bedside Cabinet with These Free PDF Guides

Are you looking to add a touch of personalized charm to your bedroom while also saving some money? Look no further than building your own bedside cabinet! With the help of these free PDF guides, you can create a beautiful and functional piece of furniture that perfectly complements your space.

Why Build Your Own Bedside Cabinet?

There are many benefits to taking on this DIY project. Firstly, it's a fantastic way to unleash your creativity and personalize your bedroom with a unique piece. You have complete control over the design, dimensions, and materials, ensuring it fits your exact needs and style. Secondly, building your own bedside cabinet can be a cost-effective solution compared to purchasing one from a store. You can choose budget-friendly materials and avoid the markups often associated with pre-made furniture.

Free PDF Guides for Your Bedside Cabinet Project

The internet is brimming with free PDF guides designed to help you craft your dream bedside cabinet. Here are some resources you can explore:

Beginner-Friendly Guides

  • "Simple Bedside Cabinet for Beginners" - This guide provides step-by-step instructions, detailed diagrams, and clear explanations, making it perfect for those new to woodworking.
  • "Build a Basic Nightstand in an Afternoon" - This guide focuses on efficiency, offering a quick and easy project for busy DIYers.

Advanced Projects

  • "Elegant Bedside Cabinet with Drawers and Shelves" - This guide tackles a more complex design, featuring detailed instructions for creating intricate drawers and shelves.
  • "Modern Bedside Cabinet with Built-in Lighting" - For those seeking a contemporary aesthetic, this guide incorporates instructions for integrating lighting into your cabinet.

Specialty Guides

  • "Rustic Bedside Cabinet from Reclaimed Wood" - This guide offers a unique approach, using salvaged wood to create a one-of-a-kind piece with a vintage appeal.
  • "Kid-Friendly Bedside Cabinet with Storage Compartments" - This guide focuses on building a durable and practical bedside cabinet specifically designed for children.

Essential Tips for a Successful Project

Before you embark on your bedside cabinet building journey, consider these tips for a smooth and enjoyable experience:

  • Choose the right materials: Carefully select materials that are durable, affordable, and match your aesthetic vision.
  • Prepare your workspace: Ensure you have a clean and well-lit workspace with adequate tools and safety equipment.
  • Read the instructions thoroughly: Take your time to understand each step before starting, and don't hesitate to ask for clarification if needed.
  • Take your time: Building a bedside cabinet is a rewarding process, but it requires patience. Don't rush the steps and allow yourself time to ensure accuracy.

Enjoy the Journey!

Building your own bedside cabinet is a fulfilling and rewarding experience. By following these free PDF guides and utilizing the provided tips, you can create a beautiful and functional piece of furniture that reflects your personal style and adds a touch of handcrafted charm to your bedroom.

BeginnerÂ’s Guide to Cold Frame Gardening

Beginner’s Guide to Cold Frame Gardening

Beginner’s Guide to Cold Frame Gardening

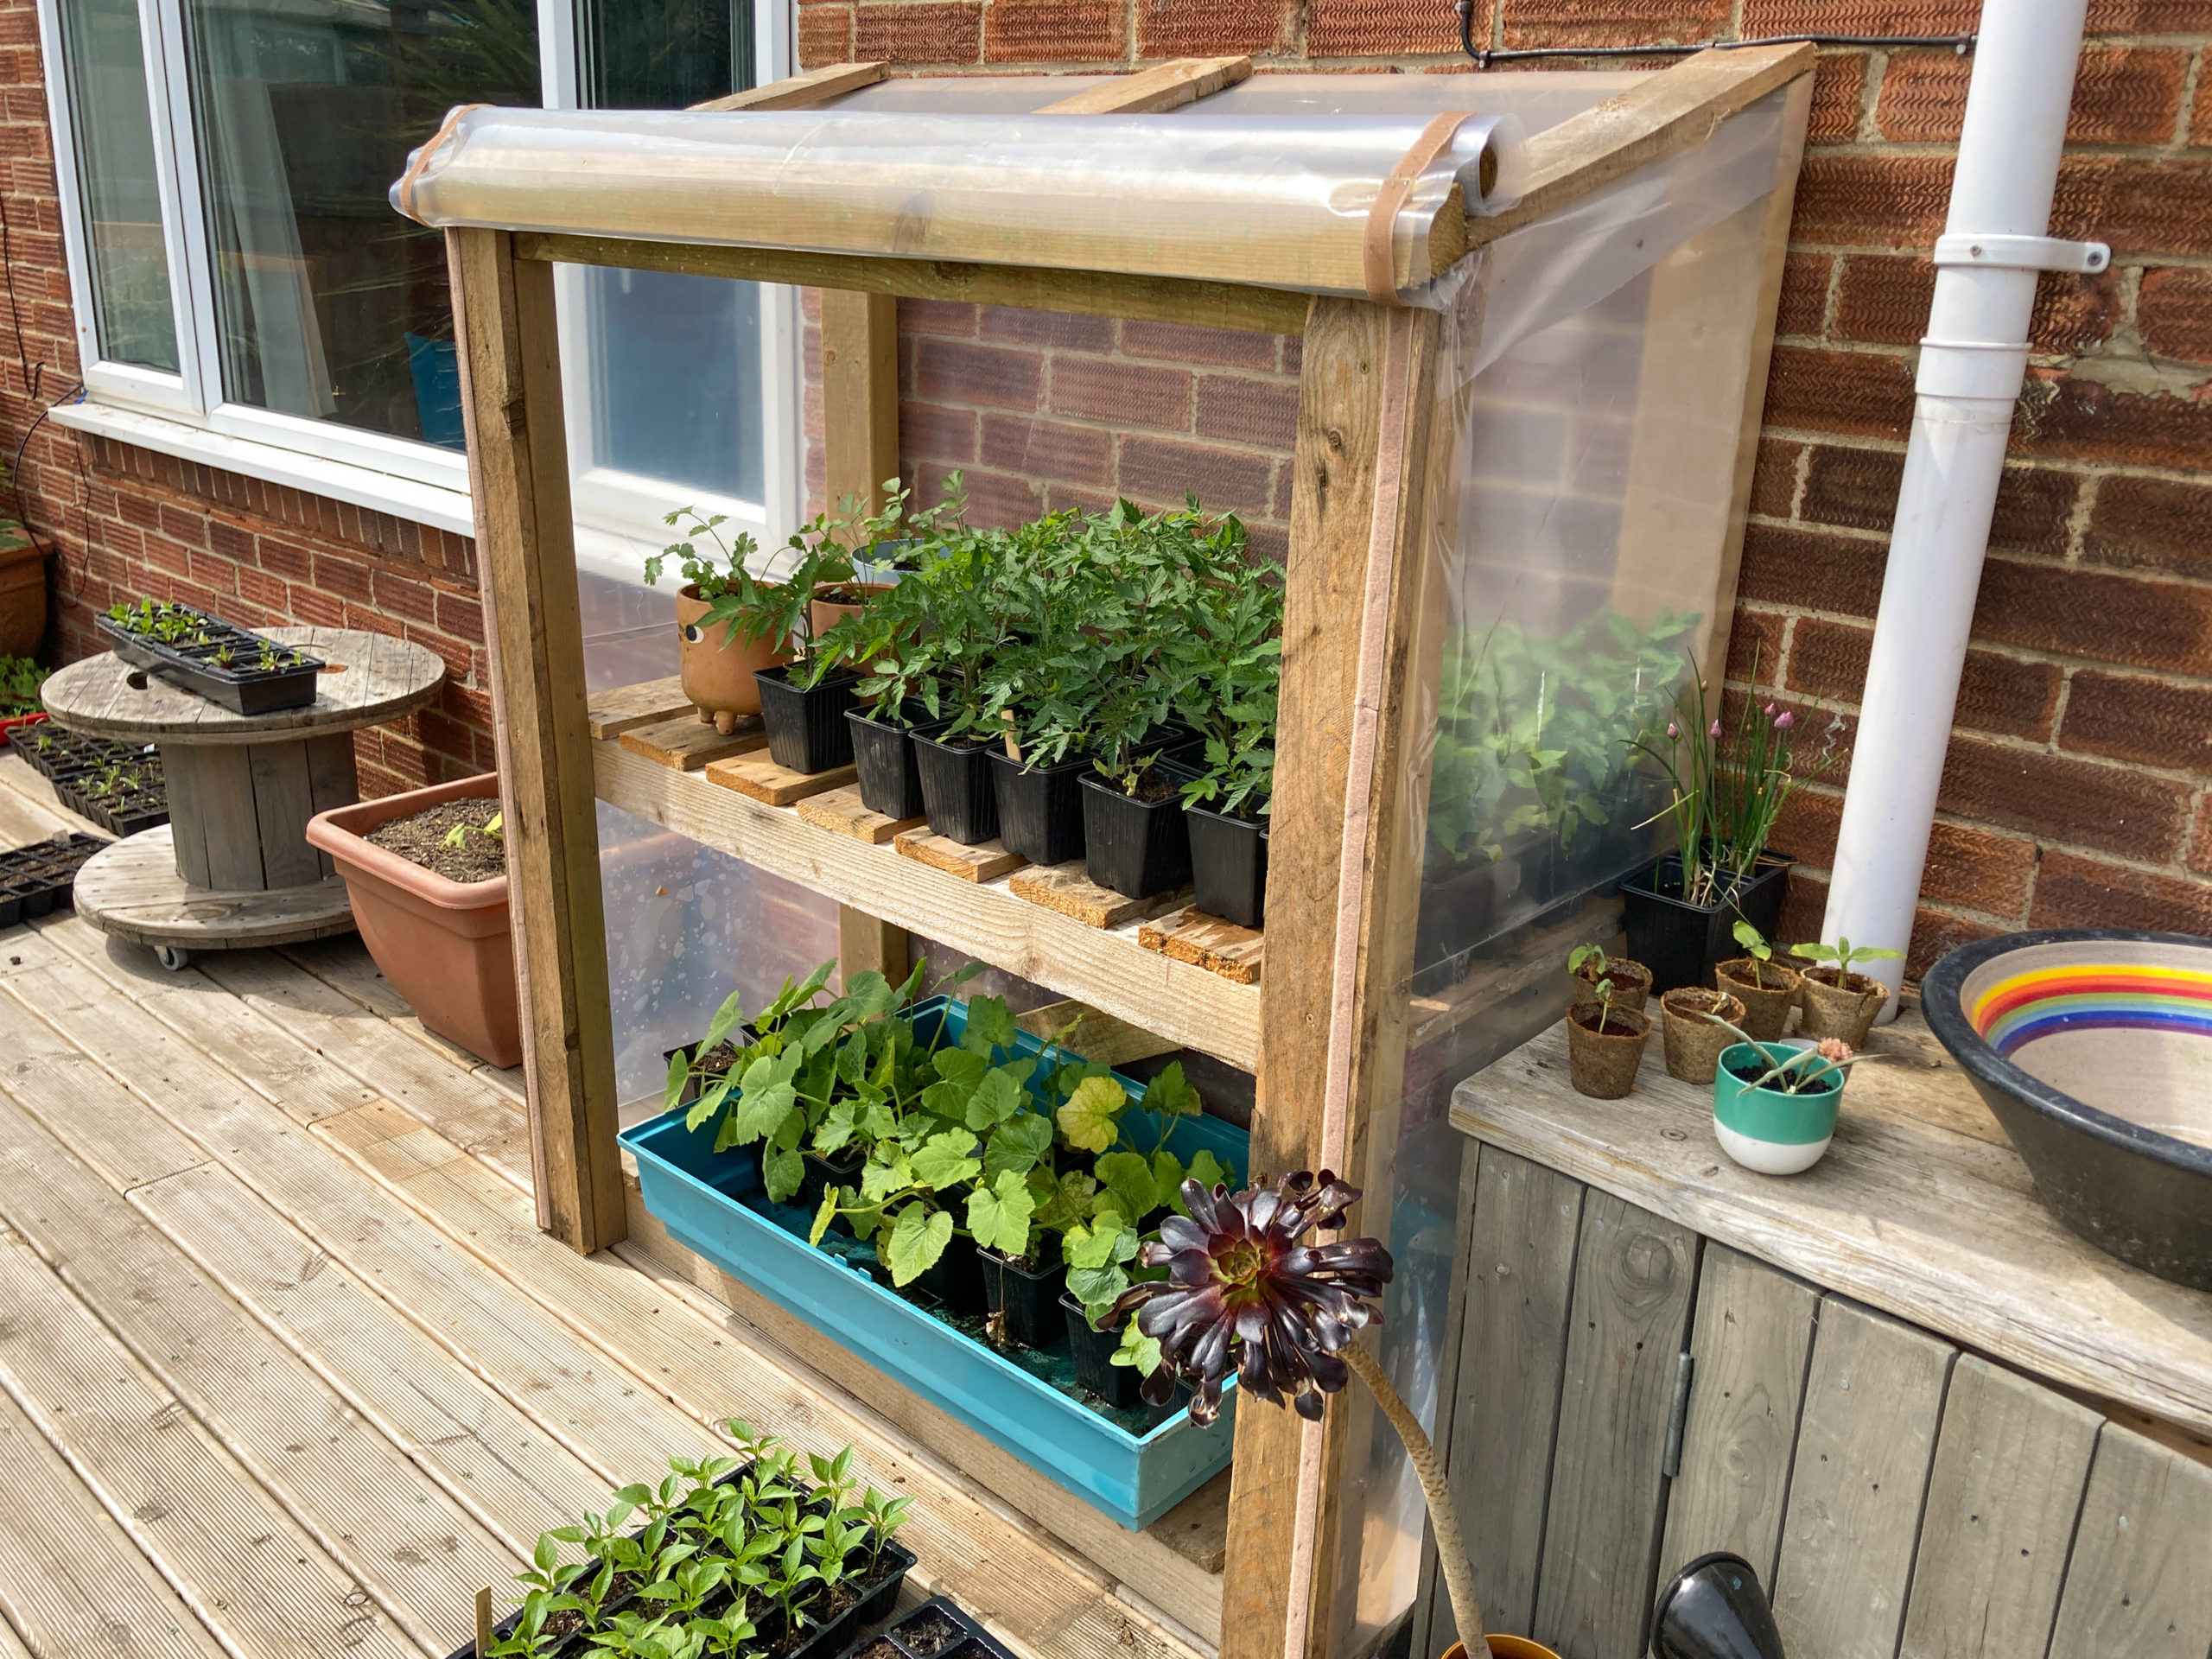
So you're thinking about giving cold frame gardening a try? It's a fantastic way to extend your growing season, get a head start on spring, and even protect your plants from the harsh winter weather. But let's be honest, the idea of a cold frame can seem a little intimidating. Don't worry, I'm here to break it down for you and make it easy to understand.

Imagine a mini greenhouse, but without the heating system. That's basically what a cold frame is all about. It's a simple, often DIY-friendly structure that traps solar heat to create a warmer, more protected microclimate for your plants. It's perfect for starting seeds, hardening off seedlings, and even extending the growing season for certain vegetables.

Why Choose Cold Frame Gardening?

Cold frame gardening is a great option for anyone looking for a more sustainable and cost-effective way to garden. Here are some reasons why you might want to consider using a cold frame:

  • Extended Growing Season: Enjoy fresh veggies and herbs longer than ever before. Start seeds earlier in the spring and keep your plants growing well into fall, even in cooler climates.
  • Faster Germination: Warm soil temperatures in the cold frame promote quicker seed germination. This means you'll see those sprouts popping up faster!
  • Better Seedling Development: Cold frames provide a protected environment, shielding your seedlings from harsh winds, frost, and even pests. This gives them a better chance of thriving.
  • Hardening Off Made Easy: Before you transplant your seedlings to the garden, you need to "harden them off" by gradually introducing them to the outdoor conditions. A cold frame is a perfect place to do this.
  • Cost-Effective: Cold frames are usually inexpensive to build or purchase, and they can be a real money-saver when it comes to extending your growing season.

Types of Cold Frames

Cold frames come in all shapes and sizes, from simple DIY creations to more elaborate, pre-built options. Here are some of the most common types:

DIY Cold Frames

  • Wood Frame: This is a classic and easy-to-build option. You can use salvaged wood, like old pallets or fence boards, to create the frame.
  • Window Frame: If you have an old window laying around, it's perfect for a cold frame. Just build a frame to support it, and you're good to go.
  • Brick or Stone: For a more permanent structure, consider using bricks or stones to build your cold frame.

Pre-built Cold Frames

  • Plastic Cold Frames: These are affordable and lightweight. They're often easy to move around in your garden.
  • Metal Cold Frames: Metal frames are durable and rust-resistant, making them a good choice for longer-term use.

Building Your Own Cold Frame

Building your own cold frame can be a rewarding experience. It's a great way to customize it to fit your needs and your garden. You'll need some basic tools and materials.

Materials

  • Wood: Choose a durable wood like cedar or redwood. You can also use pressure-treated wood, but make sure it's safe for use with plants.
  • Glass or Plastic: You'll need a clear cover for your cold frame. Glass is durable and allows for good light transmission, but it can be heavy. Plastic is lighter and more affordable, but it may not last as long.
  • Hinges and Latch: You'll need hinges to attach the cover to the frame and a latch to secure it closed.
  • Screws and Nails: You'll need screws and nails to assemble the frame.

Steps

1. Plan Your Design: Decide on the size and shape of your cold frame. Consider how much space you have and the types of plants you want to grow.

2. Cut the Wood: Measure and cut the wood pieces according to your design.

3. Assemble the Frame: Use screws and nails to assemble the frame. Make sure it's sturdy and square.

4. Attach the Cover: Use hinges to attach the cover to the frame. Make sure the cover can open and close easily.

5. Install the Latch: Install the latch to secure the cover closed when needed.

6. Add Ventilation: To prevent overheating, you'll want to add ventilation to your cold frame. You can do this by adding a small vent to the top or sides.

7. Choose a Location: Place your cold frame in a sunny spot, but make sure it's protected from strong winds.

Setting Up Your Cold Frame

Once your cold frame is built, you're ready to set it up and start growing. Here's what you need to do:

Preparing the Soil

  • Start with a Good Base: Fill your cold frame with a quality potting mix or garden soil. Make sure the soil is well-drained. You can also add some compost for extra nutrients.
  • Level the Soil: Level the soil in your cold frame so that it's even and ready for planting.

Planting Your Seeds or Seedlings

  • Choose the Right Plants: Cold frames are great for growing a variety of plants, including vegetables, herbs, flowers, and even some fruits. Just make sure you choose plants that are suitable for your climate.
  • Follow Planting Instructions: Plant your seeds or seedlings according to the instructions on the seed packet or plant tag.

Watering and Caring for Your Plants

  • Water Regularly: Check the soil moisture regularly and water your plants as needed.
  • Ventilate: On sunny days, open the cover of your cold frame to allow for air circulation and prevent overheating.
  • Monitor Temperatures: Use a thermometer to monitor the temperature inside your cold frame. The ideal temperature for most seedlings is around 65-75 degrees Fahrenheit (18-24 degrees Celsius).

Common Cold Frame Gardening Mistakes

Here are some common mistakes that beginner cold frame gardeners make:

  • Overwatering: Too much water can lead to root rot. Check the soil moisture regularly and water only when the top inch of soil is dry.
  • Not Enough Ventilation: A lack of ventilation can cause the temperature inside the cold frame to get too high. Make sure to open the cover on sunny days to allow for air circulation.
  • Poor Soil Drainage: If the soil in your cold frame is too compact or poorly drained, it can lead to root rot. Make sure to use a quality potting mix or amend the soil with compost to improve drainage.
  • Not Hardening Off Seedlings: Before you transplant your seedlings to the garden, it's important to harden them off. This means gradually introducing them to the outdoor conditions by leaving the cold frame cover open for longer periods each day.

Enjoying Your Harvest

Congratulations! You've successfully grown your plants in a cold frame. Now it's time to enjoy the fruits of your labor. Harvest your vegetables and herbs when they're ready and savor the satisfaction of growing your own food.

The Ultimate DIY Guide for Squirrel Den Boxes

The Ultimate DIY Guide for Squirrel Den Boxes

The Ultimate DIY Guide for Squirrel Den Boxes: Build a Cozy Haven for Your Fuzzy Friends

Have you ever watched a squirrel scampering through your backyard, its bushy tail a blur of activity? You might be surprised to learn that these tiny creatures play a vital role in the ecosystem, helping to spread seeds and control insect populations. But sometimes, these acrobatic critters need a little help finding a safe and comfortable place to call home. That's where squirrel den boxes come in!

Building a squirrel den box is a fun and rewarding project that can bring you closer to nature and provide a safe haven for your furry friends. This guide will take you through the entire process, from materials to construction, so you can create the perfect home for your local squirrels.

Why Build a Squirrel Den Box?

You might be thinking, "Why do squirrels need my help? They seem pretty good at building their own nests!" While that's true for some squirrels, there are several reasons why a squirrel den box can be beneficial:

  • Provides a Safe and Secure Home: Squirrel den boxes offer protection from predators, bad weather, and extreme temperatures, making them a much safer alternative to tree cavities.
  • Helps with Overcrowding: In densely populated areas, squirrels may struggle to find suitable nesting sites. A den box can help ease overcrowding and provide a comfortable space for a family of squirrels.
  • Encourages Biodiversity: A squirrel den box can attract a variety of wildlife to your yard, increasing the biodiversity and ecological balance of your environment.
  • Gives You a Front-Row Seat: Who wouldn't love to watch a family of squirrels go about their daily lives? A squirrel den box can bring you closer to these fascinating creatures and provide you with endless hours of entertainment.

Choosing the Right Location

The location of your squirrel den box is crucial for its success. Squirrels are naturally cautious creatures, so finding a spot that provides safety, privacy, and easy access to resources is key.

  • Height: Aim for a location at least 6 feet off the ground, ideally against a tree trunk or a sturdy wall. This will deter predators like cats and raccoons from reaching the box.
  • Sunlight: Choose a location that receives some sunlight but also has shade during the hottest parts of the day. This will help regulate the temperature inside the box.
  • Proximity to Food and Water: Locate the box near a source of food, such as a bird feeder, and a source of water, like a birdbath or a nearby stream. This will make it easier for squirrels to access the essentials.
  • Consider the Wind: Avoid placing the box in a location that is exposed to strong winds, as this can make it uncomfortable for squirrels and potentially damage the box.

Materials and Tools

Now for the fun part â€" gathering your supplies! You'll need a few basic materials and tools to build a squirrel den box. Here's a list to get you started:

  • Wood: Use untreated, weather-resistant wood like cedar, redwood, or pressure-treated pine. These woods are durable and will withstand the elements for years to come.
  • Screws or Nails: Choose screws or nails that are long enough to securely fasten the wood together.
  • Saw: You'll need a saw to cut the wood to size. A circular saw or a hand saw will work fine.
  • Drill: A drill with a bit that is slightly smaller than the screws you are using will make it easier to pre-drill holes in the wood, preventing splitting.
  • Level: A level will ensure that your squirrel den box is installed straight and stable.
  • Measuring Tape: A measuring tape is essential for accurate cuts and ensuring that your box is the right size.
  • Safety Glasses: Always wear safety glasses when working with power tools and wood.

The Construction Process

Once you have all your materials and tools, you're ready to start building your squirrel den box! Here's a step-by-step guide:

Step 1: Build the Base

Cut four pieces of wood for the base of the box. The size will depend on your desired dimensions for the box. These pieces will form the bottom and the sides of the box. Ensure they are all the same length and width.

Step 2: Attach the Sides

Attach the side pieces to the bottom piece using screws or nails. Use your level to ensure the sides are perpendicular to the bottom. Make sure to pre-drill holes in the wood to prevent splitting.

Step 3: Build the Roof

Cut two pieces of wood for the roof. These pieces should be slightly wider than the base of the box to create an overhang, which will help protect the squirrels from rain and snow. Attach the roof pieces to the top of the sides using screws or nails. You can make a simple flat roof, or you can add a slight angle for drainage.

Step 4: Install the Entrance

Cut a square or circular opening in one side of the box. This will be the entrance for the squirrels. The opening should be approximately 3-4 inches in diameter.

Step 5: Add a Front Panel

Cut a piece of wood to fit the front of the box. This will serve as a front panel and make it easier for squirrels to enter the box. Attach it using screws or nails, leaving a small gap between the panel and the opening to allow for ventilation.

Step 6: Add Interior Features

To make the box more comfortable for squirrels, consider adding a few interior features. You can create a small platform inside the box for the squirrels to rest on. If desired, you can also include some nesting material, such as shredded paper or soft wood shavings. Avoid using materials that could be harmful to squirrels, such as plastic or treated wood.

Step 7: Finishing Touches

Once the basic structure is complete, you can add some finishing touches to your squirrel den box. Sand down any rough edges to make the box smooth for the squirrels. You can also stain or paint the box to blend in with your surroundings or add a decorative touch.

Installing the Squirrel Den Box

You've worked hard to create a cozy home for your furry friends. Now it's time to install it!

  • Mount it Securely: Use sturdy screws and bolts to attach the box to a tree or wall. Make sure the box is level and stable.
  • Add a Barrier: To prevent predators from climbing to the box, you can add a barrier around the base of the tree or wall. A smooth metal collar or a strip of sheet metal will work well.
  • Leave it Alone: Once the box is installed, try not to disturb it too much. Give the squirrels time to adjust to their new home.

Maintenance and Monitoring

To ensure your squirrel den box remains a safe and welcoming haven for your furry friends, a little maintenance is necessary:

  • Check for Damage: Inspect the box regularly for any signs of damage, such as cracked wood or loose screws. Repair any issues promptly to prevent the box from becoming unsafe.
  • Clean the Box: Periodically clean the inside of the box to remove any debris or nesting material. This will help prevent the buildup of bacteria and parasites.
  • Monitor Activity: Observe the box and see if squirrels are using it. If you don't see any signs of activity, consider making adjustments to the location or the design of the box.

Building a squirrel den box is a rewarding project that can bring you closer to nature and provide a safe haven for these fascinating creatures. By following these guidelines, you can create a comfortable and welcoming home for your local squirrels and enjoy the joy of watching them thrive in your backyard. Happy building!

How to Download Free PDF Squirrel Den Box Plans

How to Download Free PDF Squirrel Den Box Plans

Downloading Free PDF Squirrel Den Box Plans

Building a squirrel den box, also known as a squirrel nesting box, is a rewarding and enjoyable project for anyone interested in wildlife conservation and providing a safe haven for these adorable creatures. A squirrel den box offers a secure and comfortable space for squirrels to rest, raise their young, and escape from predators. The internet provides a wealth of resources for free PDF plans to help you create your very own squirrel den box.

The Benefits of Building a Squirrel Den Box

Providing squirrels with a safe and secure den box offers numerous benefits, both for the squirrels and for your backyard ecosystem.

  • Provides shelter: Squirrel den boxes offer a safe and secure space for squirrels to rest, escape from predators, and raise their young, especially during harsh weather conditions.
  • Promotes population control: Squirrel den boxes can help regulate squirrel populations by providing a designated nesting area, reducing competition for natural resources, and encouraging their healthy development.
  • Enhances biodiversity: Squirrels play an essential role in maintaining biodiversity within your backyard. They help distribute seeds, contributing to the growth of native plants and providing food for other animals.
  • Adds beauty to your landscape: Squirrel den boxes, crafted with care and placed thoughtfully, can enhance the aesthetic appeal of your landscape, adding charm and a sense of wildlife-friendly living.

Finding Free PDF Squirrel Den Box Plans

The internet provides a vast library of free PDF squirrel den box plans, catering to various skill levels and preferences. Here are some reputable sources for finding these plans:

Online Wildlife Conservation Organizations

Wildlife conservation organizations, dedicated to promoting wildlife habitat and conservation, often provide free resources, including squirrel den box plans. These organizations typically offer plans that are environmentally friendly and designed to ensure the well-being of squirrels.

  • National Wildlife Federation (NWF): The NWF offers a wide range of resources for backyard wildlife enthusiasts, including squirrel den box plans. Their website provides detailed instructions, specifications, and design tips for creating safe and comfortable squirrel homes.
  • The Audubon Society: This renowned conservation organization provides valuable information on various aspects of wildlife conservation, including building bird and squirrel nesting boxes. They often publish free PDF plans for squirrel den boxes, encouraging people to participate in wildlife conservation.
  • Wildlife Rehabilitation Centers: Wildlife rehabilitation centers frequently offer free resources, including squirrel den box plans, to support wildlife rescue and conservation efforts. These plans are typically designed by experienced wildlife experts to meet the specific needs of squirrels.

DIY and Woodworking Websites

DIY and woodworking websites, known for their vast collection of craft projects and building instructions, often include free PDF plans for squirrel den boxes. These plans cater to both beginners and experienced woodworkers, providing detailed step-by-step instructions and materials lists. Here are some popular options:

  • Ana White: Ana White is a well-known woodworking expert and blogger, offering a plethora of free woodworking plans. Her website includes plans for various projects, including squirrel den boxes, designed for easy construction and appealing aesthetics.
  • The Woodworking Source: The Woodworking Source is an extensive online resource for woodworkers, providing detailed plans for various projects, including squirrel den boxes. They offer a wide range of plans, catering to different skill levels and preferences.
  • Pinterest: Pinterest is a popular platform for sharing creative ideas and DIY projects. Searching for "squirrel den box plans" on Pinterest will reveal a collection of inspiring designs and downloadable plans from various sources.

Local Wildlife Agencies

Your local wildlife agency, such as the Department of Wildlife Resources or Fish and Wildlife Service, may offer free PDF plans for squirrel den boxes specifically designed for the wildlife in your region. These plans may include recommendations for materials, construction methods, and placement guidelines that are tailored to the local environment.

Choosing the Right Squirrel Den Box Plan

With a multitude of free PDF squirrel den box plans available, selecting the right plan can be a fun and exciting part of the process. Here are some factors to consider when choosing your plan:

  • Species of squirrel: Squirrel species vary in size and nesting preferences. Ensure the plan you choose is designed for the type of squirrel most common in your area. For example, plans for eastern gray squirrels may be larger than those for tree squirrels.
  • Materials: Consider the materials used in the plan. Choose plans that utilize durable and weather-resistant materials like cedar, redwood, or pressure-treated lumber. Avoid using toxic paints or varnishes that could harm the squirrels.
  • Accessibility and location: The plan should include recommendations for placing the den box in a safe and accessible location for the squirrels. Factors like tree height, proximity to food sources, and protection from predators should be considered.
  • Ventilation and drainage: Ensure the plan includes features for proper ventilation and drainage to prevent moisture buildup and maintain a healthy environment for the squirrels.
  • Skill level: Choose a plan that aligns with your woodworking skills. Beginners may opt for simpler plans, while experienced woodworkers can explore more complex designs.

Additional Tips for Building a Squirrel Den Box

Once you've chosen a plan, follow these helpful tips to build a safe and comfortable home for squirrels:

  • Use rough-sawn lumber: Rough-sawn lumber provides a natural surface that squirrels can easily grip and climb.
  • Avoid using glue: Glue can release harmful fumes that could affect the squirrels.
  • Place the den box securely: Mount the den box securely to a tree trunk or sturdy post, high enough to protect it from predators and weather.
  • Provide a drainage hole: Include a small drainage hole in the bottom of the box to prevent moisture buildup.
  • Clean the den box annually: Clean the den box annually to remove debris and parasites, ensuring a healthy environment for the squirrels.

Conclusion

Building a squirrel den box is a rewarding and enjoyable way to contribute to wildlife conservation. With the abundance of free PDF plans available online, you can easily find the perfect plan to match your skills and preferences. By providing squirrels with a safe and comfortable home, you can help these adorable creatures thrive and contribute to the biodiversity of your backyard ecosystem. Remember to follow the instructions carefully, use appropriate materials, and maintain the den box for optimal results.

How to build a sturdy grill gazebo for long-term use

How to build a sturdy grill gazebo for long-term use

Building a Sturdy Grill Gazebo for Long-Term Use

Hey there, grill masters! Are you tired of battling the elements while you're trying to cook up a delicious feast? A grill gazebo can be the perfect solution. Not only does it protect you from the sun, rain, and wind, but it also gives your backyard a touch of style and functionality. Building your own grill gazebo is a rewarding project, and when you're done, you'll have a sturdy structure that will last for years.

This guide will walk you through everything you need to know, from choosing the right materials to putting the finishing touches on your masterpiece. So grab your tools, get ready to get your hands dirty, and let's build a grill gazebo you'll be proud to call your own!

Planning Your Grill Gazebo

Before you start hammering and sawing, take some time to plan out your grill gazebo. Here's a list of things to consider:

Size and Shape

First things first, you'll need to decide how big you want your gazebo to be. Consider the size of your grill, the number of people you typically entertain, and the amount of space you have available in your backyard. You don't want it to be too small or too large. A square or rectangular shape is usually the easiest to build, but if you're feeling adventurous, you can go for a round or octagonal design.

Materials

The materials you choose will determine the strength and durability of your gazebo. Here are some popular options:

  • Posts: Pressure-treated lumber, metal (aluminum or steel), or composite materials.
  • Roof: Aluminum or steel roofing, polycarbonate panels, or fabric (canvas or vinyl).
  • Framing: Pressure-treated lumber, metal studs, or composite materials.

Pressure-treated lumber is a great choice for posts and framing, as it's resistant to rot and insects. Metal is another durable option that requires minimal maintenance. For the roof, you can choose a material that provides shade and protection from the elements.

Style and Features

Do you want a simple gazebo with a basic roof, or something more elaborate with side panels, storage compartments, or a built-in bar? Consider what features would enhance your grilling experience and complement your backyard. There are endless possibilities!

Location and Access

Think about where you want to place your gazebo. Make sure it's on level ground and accessible to your grill, your house, and any outdoor furniture. Consider the direction of the sun and wind to ensure your gazebo provides adequate shade and protection.

Permits and Regulations

Check with your local building department to see if you need permits to build a gazebo. There may also be restrictions on the size and materials you can use.

Gathering Your Tools and Materials

Once you have your plans in place, it's time to gather the tools and materials you'll need. Here's a basic list to get you started:

  • Post-hole digger
  • Level
  • Measuring tape
  • Circular saw
  • Drill
  • Screwdriver
  • Hammer
  • Safety glasses
  • Work gloves
  • Lumber
  • Concrete mix
  • Roofing material
  • Fasteners (screws, bolts, nails)
  • Paint or stain (optional)

This list can vary depending on the design of your gazebo, so adjust accordingly.

Building the Foundation

A sturdy foundation is crucial for a long-lasting gazebo. Here's how to set your posts in concrete:

  1. Mark and Dig the Holes: Using your plans as a guide, mark the location of your posts. Dig holes that are deep enough to accommodate the posts and allow for at least 12 inches of concrete below ground. The holes should be wider than the post diameter for proper concrete coverage.
  2. Install the Posts: Place the posts in the holes, making sure they're plumb (vertical) using a level. Check for any uneven ground and adjust accordingly. Temporary bracing can be used to keep the posts stable until the concrete sets.
  3. Mix and Pour the Concrete: Follow the instructions on the concrete mix bag for mixing the concrete. Carefully pour the concrete into each hole, making sure to fill it around the post to ensure a solid foundation. Use a piece of wood or a level to make the top of the concrete flush with the ground.
  4. Let the Concrete Cure: Allow the concrete to cure for at least 24 hours before moving on to the next step. You can cover the concrete with a tarp to help it cure evenly.

Framing the Gazebo

Once your foundation is set, it's time to start framing the gazebo. This will give your structure shape and strength:

  1. Cut and Attach the Beams: Cut your beams to the appropriate lengths and attach them to the top of your posts. You can use screws or bolts for this step, making sure they're long enough to securely fasten the beams to the posts. Use a level to ensure that the beams are level and that the corners of your gazebo are square.
  2. Install the Rafters: Cut the rafters to the desired length and attach them to the beams. The rafters should be spaced evenly and run from one beam to the other. Use screws or bolts to secure them, making sure they're long enough to penetrate both the rafter and the beam.
  3. Add Bracing: For extra stability, you can add bracing between the rafters and the beams. This will help to prevent sagging and make your gazebo even stronger.

Installing the Roof

With the framing complete, it's time to give your gazebo a roof. The type of roof you choose will depend on your personal preference and the climate you live in. Here's how to install a basic roof:

  1. Lay the Roofing Material: If you're using roofing panels, start by laying the first panel at the bottom of the roof, aligning it with the edge of the rafters. Use screws or nails to fasten the panels to the rafters, making sure to space them according to the manufacturer's instructions. Overlap the panels to create a watertight seal.
  2. Secure the Edges: Once you've laid all the panels, use flashing or other trim pieces to seal the edges of the roof. This will help to prevent water from entering the gazebo.
  3. Install the Gutters (optional): If you want to collect rainwater, you can install gutters around the edges of the roof. This will help to prevent water from damaging your gazebo and your yard.

Adding Finishing Touches

With the roof in place, it's time to add the finishing touches to your gazebo. Here are some ideas to make it even more functional and stylish:

  • Install Side Panels: If you want to create a more enclosed space, you can add side panels to your gazebo. These can be made from fabric, vinyl, or even wood. You can choose a design that complements your existing decor.
  • Add a Ceiling Fan: A ceiling fan can provide some cooling relief on hot days. Choose a fan that's specifically designed for outdoor use and has a waterproof rating.
  • Install Lighting: Add some lighting to your gazebo so you can enjoy it after dark. Consider string lights, LED strips, or even a chandelier for a touch of elegance.
  • Build Storage Compartments: Create some storage space within your gazebo to keep your grilling tools, outdoor furniture cushions, and other items organized. You can build shelves, drawers, or a small cabinet to suit your needs.
  • Paint or Stain: Give your gazebo a fresh look by painting or staining the wood. Choose a color that complements your backyard and your home's exterior.

Maintenance Tips

With a little care, your grill gazebo will last for many years. Here are some tips for keeping it in tip-top shape:

  • Clean the Roof Regularly: Remove leaves, debris, and any other buildup on the roof to prevent water damage and to keep your gazebo looking its best.
  • Inspect for Damage: Regularly check the structure of your gazebo for any signs of damage, such as cracks in the wood, loose screws, or rust on metal components. Address any issues promptly to prevent them from worsening.
  • Repaint or Stain as Needed: Over time, paint and stain will fade and chip. Repaint or stain your gazebo every few years to keep it looking fresh and to protect it from the elements.
  • Cover It During Severe Weather: If you expect heavy rain, snow, or high winds, consider covering your gazebo with a tarp or other protective material. This will help to prevent damage and extend its lifespan.

Building your own grill gazebo is a rewarding project that will give you a fantastic outdoor space for years to come. With careful planning, quality materials, and a little effort, you can create a sturdy and stylish gazebo that you'll love to gather around. Happy grilling!

Building a grill gazebo: how to make it a centerpiece of your yard

Building a grill gazebo: how to make it a centerpiece of your yard

Elevate Your Backyard with a Grill Gazebo: A Centerpiece of Outdoor Living

Imagine this: the sun dips below the horizon, casting long shadows across your yard. You gather with friends and family, the air alive with laughter and the aroma of sizzling food. The centerpiece of it all? Your stunning grill gazebo, a sanctuary of comfort and style, where culinary adventures meet outdoor relaxation.

A grill gazebo isn't just a shelter for your grill; it's a statement piece that transforms your backyard into an inviting oasis. It's an extension of your home, a place to connect, create memories, and savor the simple pleasures of outdoor living.

Designing Your Dream Grill Gazebo

Before you break ground, envision your ideal grill gazebo. What vibe are you going for? A rustic retreat? A modern oasis? A cozy cottage? Consider:

Size and Shape

Determine the size that comfortably accommodates your grill and guests. Think about the flow of traffic and ensure enough room for dining and socializing. Popular shapes include square, rectangular, and octagonal, each offering a unique aesthetic.

Materials

From durable wood to low-maintenance aluminum, materials dictate the style and longevity of your gazebo. Wood provides warmth and character, while aluminum offers weather resistance and sleekness. Don't forget about the roof! Choose from sturdy shingles, durable metal, or even a retractable awning for flexibility.

Features and Amenities

Elevate your gazebo experience with thoughtful additions. Integrate a bar area for entertaining, add a built-in smoker for adventurous grilling, or install a fireplace for cozy nights. Consider lighting options, from charming string lights to elegant sconces, to create ambiance after dark.

Creating a Centerpiece

Transform your grill gazebo from a mere structure into a captivating centerpiece with these design tips:

Landscaping and Hardscaping

Frame your gazebo with lush landscaping. Plant vibrant flowers, fragrant herbs, or even a small vegetable garden to create a welcoming entrance. Add a paved patio or a charming stone walkway to enhance the visual appeal and provide easy access.

Furniture and Decor

Select comfortable and stylish outdoor furniture that complements the gazebo's design. Consider a dining table and chairs for group meals, comfy lounge chairs for relaxation, or a cozy seating area with a fire pit. Add pops of color with throw pillows, blankets, and vibrant outdoor rugs.

Lighting

Illuminate your gazebo to create a magical atmosphere. Install pendant lights or string lights over the dining area, and place lanterns or sconces around the perimeter for a soft glow. These lighting touches transform your gazebo into a magical haven, even after the sun sets.

Embrace Outdoor Living

Your grill gazebo is more than just a structure; it's an invitation to enjoy the great outdoors. Host cookouts, gather with friends, and create lasting memories under its welcoming roof. Let the warmth of the grill, the laughter of your loved ones, and the beauty of your backyard become the heart of your home.

So, start planning today and let your grill gazebo become the centerpiece of your outdoor living space. It's a project that promises to bring joy, comfort, and countless unforgettable moments for years to come.

Free PDF Guide to Cold Frame Building

Free PDF Guide to Cold Frame Building

Your Guide to Building a Cold Frame: A Simple, Affordable Way to Extend Your Growing Season

Hey there, fellow gardening enthusiast! Are you looking for a way to get a head start on your spring planting or keep your veggies going strong into the fall? Then building a cold frame is the perfect solution for you. It's like a mini-greenhouse, but way more affordable and surprisingly easy to build.

A cold frame is essentially a box with a transparent lid. It traps the sun's warmth, creating a microclimate that's warmer than the surrounding air. This allows you to plant seeds and seedlings earlier in the spring, extend your harvest into the fall, and even overwinter certain tender plants. The best part? You can build a cold frame from readily available materials, making it a truly budget-friendly project.

Why Build a Cold Frame?

There are a ton of great reasons to build a cold frame. Here are a few to get you excited:

  • Extend your growing season: Give your plants a jump start in the spring and keep them going strong well into the fall.
  • Protect your plants from harsh weather: Keep your delicate seedlings safe from frost and cold winds.
  • Start seeds indoors: Create a warm, inviting environment for starting your seeds before transplanting them outdoors.
  • Save money on your heating bill: Cold frames are a much more cost-effective way to extend your growing season than a full-blown greenhouse.
  • Enjoy a longer harvest: Keep your veggies producing even when the weather turns cold. You'll be able to enjoy fresh produce from your garden for a much longer time.
  • It's a fun DIY project! Building your own cold frame is a rewarding and enjoyable experience.

Choosing the Right Location for Your Cold Frame

The location of your cold frame is crucial to its success. Here's what you need to consider:

  • Sunlight: Your cold frame needs at least 6 hours of direct sunlight daily, ideally more. A south-facing location is best.
  • Drainage: The ground should be well-drained so that water doesn't pool around the base of the cold frame.
  • Accessibility: Choose a spot where you can easily access your cold frame for planting, watering, and harvesting.
  • Protection from wind: A location sheltered from strong winds will help keep your plants protected.

Building Your Cold Frame: A Step-by-Step Guide

Now for the fun part â€" building your cold frame. Here's a step-by-step guide to get you started:

Materials You'll Need:

  • Base: You can use untreated lumber (like pine or cedar) for a traditional cold frame. You could also use concrete blocks, bricks, or recycled pallets.
  • Walls: Use more untreated lumber for the walls. You can even use recycled windows for the walls for an extra layer of insulation.
  • Lid: You have a few options here:
    • Glass: This is the most traditional option. It provides good insulation and allows for lots of light penetration. However, it can be heavy and breakable. You can use old window panes or purchase pre-cut pieces of glass.
    • Acrylic: This is a good alternative to glass as it's lighter and less breakable. It also provides good insulation. You can find sheets of acrylic at home improvement stores.
    • Polycarbonate: This is a very durable and long-lasting material. It's also very good at transmitting light. It's often used in commercial greenhouses, but you can also find smaller sheets suitable for cold frames.
  • Hinges: You'll need hinges to attach the lid to the base of the cold frame. Use strong hinges that can support the weight of the lid.
  • Fasteners: Use screws or nails to secure the base, walls, and lid together.
  • Optional: You can also add a layer of insulation (like foam board) to the base of the cold frame for extra warmth.

Step 1: Build the Base

First, create a sturdy base for your cold frame. If you're using lumber, cut pieces to your desired size and use screws or nails to join them together. If you're using bricks, blocks, or pallets, make sure they are level and secure.

Step 2: Build the Walls

Next, cut the lumber for the walls to the desired height. Remember that the walls should be high enough to allow for good air circulation and to accommodate the lid. Attach the walls to the base using screws or nails. If you're using recycled windows for the walls, make sure you have a way to secure them to the base.

Step 3: Build the Lid

Finally, build the lid for your cold frame. If you're using glass, acrylic, or polycarbonate, cut the material to fit the dimensions of the base. If you're using wood, you'll need to create a frame for the lid and then secure the glass, acrylic, or polycarbonate to the frame. Use hinges to attach the lid to the back wall of the cold frame.

Step 4: Add a Handle

For easier opening and closing, add a handle to the lid. You can use a simple wooden handle or a metal latch. Make sure the handle is securely attached to the lid.

Step 5: Install Ventilation

Ventilation is critical for regulating the temperature inside your cold frame. Add ventilation vents to the lid and the base. Use a screen or mesh to keep out insects and small animals. You can control the temperature inside the cold frame by opening and closing the vents.

Tips for Using Your Cold Frame

Now that you've built your cold frame, let's talk about how to use it. Here are a few helpful tips to help you get the most out of your cold frame:

  • Start seeds early: Sow seeds indoors about 4 to 6 weeks before the last frost. This will give your seedlings a head start.
  • Harden off seedlings: Before transplanting seedlings outdoors, harden them off by gradually acclimating them to the outside conditions. Start by placing your seedlings in the cold frame for a few hours a day, then increase the time each day.
  • Water regularly: Cold frames can dry out quickly, so water your plants regularly, especially during dry periods.
  • Monitor temperature: Use a thermometer to monitor the temperature inside the cold frame. Ideally, the temperature should be between 45 and 70 degrees Fahrenheit (7 to 21 degrees Celsius).
  • Ventilate appropriately: Open and close the vents as needed to regulate the temperature and prevent condensation buildup.
  • Clean your cold frame: Regularly remove debris and weeds to keep your cold frame clean and healthy.

Enjoy Your Cold Frame

There you have it! Building a cold frame is an incredibly rewarding experience that can significantly enhance your gardening journey. With a little effort and these tips, you'll be enjoying a longer growing season, healthier plants, and bountiful harvests.

Maximize Your Bedroom Storage with DIY Bedside Cabinets

Maximize Your Bedroom Storage with DIY Bedside Cabinets

Maximize Your Bedroom Storage with DIY Bedside Cabinets

Transform your bedroom into a haven of organization and style with DIY bedside cabinets. Forget about cluttered nightstands and embrace the beauty of custom-made storage solutions. Not only will you create a visually appealing space, but you'll also free up valuable floor space and maximize the functionality of your room.

Choosing the Right Materials

Before embarking on your DIY journey, consider the materials that best suit your needs and aesthetics.

Wood

A classic and timeless choice, wood offers durability, warmth, and a natural look. Choose from various types like pine, oak, or maple, depending on your budget and desired finish.

Plywood

A more affordable option, plywood provides strength and stability. It is available in various thicknesses and can be stained or painted to match your existing furniture.

Metal

For a modern and industrial feel, consider using metal for your bedside cabinets. Metal is robust, easy to clean, and comes in a variety of finishes, from brushed steel to powder-coated.

Planning Your Design

Now that you've selected your materials, it's time to conceptualize the perfect bedside cabinets.

Dimensions

Measure the space available beside your bed to determine the ideal dimensions for your cabinets. Consider the height, width, and depth that will best fit your needs and provide ample storage.

Style and Features

Think about the overall style of your bedroom and choose a design that complements it. Do you want a sleek minimalist look, a rustic farmhouse feel, or something more traditional? Decide on the number of shelves, drawers, or compartments you require to accommodate your belongings.

Essential Tools and Supplies

Gather the following tools and supplies to ensure a smooth and successful DIY project:

  • Saw (circular or jigsaw)
  • Drill
  • Screwdriver
  • Tape measure
  • Level
  • Sandpaper
  • Wood glue
  • Screws and nails
  • Wood filler
  • Stain or paint
  • Brushes or rollers
  • Hardware (hinges, drawer slides, knobs)

Step-by-Step Construction

With your materials, tools, and design in place, you're ready to start building:

Cutting the Pieces

Cut your wood or plywood to the desired size for the sides, top, bottom, shelves, and drawer fronts. Use a saw and a straight edge for precise cuts.

Assembling the Cabinet Frames

Join the side pieces to the top and bottom pieces using wood glue and screws. Use clamps to secure the joints while the glue dries.

Adding Shelves and Drawers

Attach shelves to the cabinet frame using brackets or screws. If you're incorporating drawers, assemble them with drawer fronts and slides. Attach the drawer slides to the cabinet frame and the drawers to the slides.

Finishing Touches

Sand the cabinet surfaces smooth to remove any rough edges or imperfections. Apply wood filler to any gaps or holes, let it dry, and sand again. Apply stain or paint to achieve your desired look. Install hardware like hinges, drawer pulls, and knobs.

Adding a Personal Touch

To make your DIY bedside cabinets truly unique, consider incorporating personal touches:

  • Decorative molding
  • Carved accents
  • Custom-made drawer pulls
  • Upcycled materials
  • Personalized labels

Enjoy Your New Storage Solutions

With your DIY bedside cabinets complete, you'll be amazed by the difference they make. Not only will they enhance the functionality of your bedroom, but they'll also showcase your creativity and add a touch of personality to your space. Embrace the satisfaction of a job well done and enjoy the convenience of organized and stylish storage solutions!

Pallet Cold Frame: Repurposing for Your Garden

Pallet Cold Frame: Repurposing for Your Garden

Pallet Cold Frame: Repurposing for Your Garden

In the realm of sustainable gardening, the art of repurposing materials has become a cherished practice, offering a blend of practicality and environmental consciousness. Among the many materials that can be given a second life in the garden, pallets stand out as versatile and readily available resources. This article delves into the world of pallet cold frames, exploring their construction, advantages, and diverse applications in cultivating a thriving garden.

The Allure of Pallet Cold Frames

Pallet cold frames, essentially mini greenhouses crafted from repurposed pallets, offer an array of benefits that make them a popular choice for gardeners of all levels. Their construction is remarkably straightforward, requiring minimal tools and materials. The inherent strength and durability of pallets ensure the cold frame's longevity, while their natural wood composition blends seamlessly with the surrounding garden landscape.

Key Advantages of Pallet Cold Frames

Beyond their aesthetic appeal, pallet cold frames boast a multitude of practical advantages:

  • Extended Growing Season: Cold frames create a microclimate within their enclosed space, trapping warmth and extending the growing season beyond the typical frost dates. This enables early spring planting and late fall harvesting.
  • Protection from Elements: The cold frame's structure shields seedlings and young plants from harsh weather conditions, such as frost, wind, and heavy rain. This protection promotes healthier growth and reduces the risk of damage.
  • Controlled Environment: Cold frames provide a degree of environmental control, allowing gardeners to regulate temperature and humidity levels. This is particularly valuable for delicate seedlings and plants that require specific conditions.
  • Reduced Water Loss: The enclosed environment of a cold frame minimizes water evaporation, reducing the need for frequent watering. This is especially helpful during dry spells.
  • Cost-Effectiveness: Repurposing pallets significantly reduces the cost of constructing a cold frame compared to purchasing a commercially manufactured one. This makes cold frames an accessible option for gardeners on a budget.

Construction Techniques

Building a pallet cold frame is a relatively simple process that can be completed within a few hours. The following steps provide a comprehensive guide:

Step 1: Material Gathering

Before embarking on construction, gather the necessary materials. These typically include:

  • Pallet(s): Choose a sturdy pallet in good condition, preferably with intact slats and minimal signs of wear. A single pallet can be sufficient for a small cold frame, while larger frames may require multiple pallets.
  • Lumber: Depending on the design, additional lumber may be required for framing, supports, or edging. Choose wood that is weather-resistant and durable.
  • Fasteners: Screws, nails, and other fasteners will be needed to assemble the structure. Use weatherproof fasteners for longevity.
  • Plastic sheeting: A clear plastic sheeting will form the lid of the cold frame, allowing sunlight to penetrate while trapping warmth. Choose a durable sheeting that can withstand the elements.
  • Hardware: Hinges, handles, and other hardware will be needed to secure the lid and provide access to the cold frame.

Step 2: Pallet Preparation

Prepare the pallet for construction by removing any loose nails, staples, or debris. Smooth out any rough edges or splinters to prevent potential injury. Thoroughly clean the pallet with a wire brush or sandpaper to remove dirt and grime.

Step 3: Framing and Support

Depending on the desired size and shape, construct a frame using lumber. This frame will provide support for the pallet and ensure its stability. The frame can be attached to the pallet using screws or nails.

Step 4: Lid Construction

Create a lid for the cold frame by attaching the plastic sheeting to a wooden frame. The frame should be slightly larger than the pallet to ensure a snug fit. Hinges and a handle can be attached to the lid for ease of access.

Step 5: Installation

Place the cold frame in a sunny location within the garden. Ensure that the frame is level and stable. The lid should open and close smoothly without obstruction.

Customization and Design

The beauty of pallet cold frames lies in their adaptability. Gardeners can customize their frames to suit their specific needs and preferences. Some popular variations include:

  • Raised Cold Frames: For elevated growing, place the pallet on bricks or other supports to create a raised cold frame. This allows for better drainage and easier access.
  • Double-Pallet Cold Frames: Utilize two pallets, one atop the other, to create a taller cold frame with greater volume. This is ideal for taller plants or for extending the growing season further.
  • Integrated Shelving: Add shelves to the cold frame for additional growing space. This allows for vertical gardening and efficient use of space.
  • Automatic Ventilation: Incorporate an automatic ventilation system using a simple mechanism, such as a thermostat-controlled fan, to regulate temperature and humidity levels within the cold frame.

Applications and Benefits

Pallet cold frames offer a versatile solution for various gardening needs, from starting seeds to protecting established plants.

Seed Starting

Cold frames are ideal for starting seeds indoors or in a protected outdoor environment. The controlled conditions promote germination and seedling development, resulting in strong and healthy plants ready for transplanting.

Plant Protection

Cold frames provide a safe haven for vulnerable plants during the winter months or in areas prone to harsh weather conditions. By extending the growing season, they enable gardeners to cultivate plants that would otherwise struggle to survive in the open.

Overwintering

For plants that require a period of dormancy during winter, cold frames can offer a controlled environment for overwintering. The enclosed space protects plants from frost and extreme temperatures, allowing them to hibernate safely until spring.

Hardening Off

Before transplanting seedlings outdoors, it is crucial to harden them off, gradually acclimating them to the harsher conditions. Cold frames provide a perfect environment for this process, allowing seedlings to adjust to outdoor temperatures, humidity, and light levels.

Beyond the Garden

The versatility of pallet cold frames extends beyond gardening. They can be repurposed for various other uses around the home, such as:

  • Compost Bins: Pallet cold frames can be easily modified into composting bins, offering a convenient and eco-friendly method for managing organic waste.
  • Storage Shelving: The strong structure of pallets makes them ideal for creating sturdy storage shelves for tools, gardening supplies, or other items.
  • Outdoor Seating: With a little creativity, pallets can be transformed into comfortable outdoor seating areas, adding rustic charm to any patio or deck.
  • Art Projects: Pallets can be incorporated into artistic projects, creating unique sculptures, wall art, or decorative pieces.

Conclusion

Repurposing pallets into cold frames is a sustainable and cost-effective way to enhance your gardening experience. These versatile structures offer a multitude of advantages, from extending the growing season to protecting plants from harsh weather conditions. With their adaptability and simplicity of construction, pallet cold frames are an excellent choice for gardeners of all levels, allowing them to cultivate a thriving garden while embracing the principles of sustainable living.

PDF Guide for Building a Cold Frame at Home

PDF Guide for Building a Cold Frame at Home

Building a Cold Frame at Home: A Comprehensive Guide

A cold frame is an invaluable tool for any gardener, extending the growing season and providing a safe haven for seedlings and delicate plants. This simple yet effective structure leverages the power of the sun to create a microclimate, protecting plants from harsh weather conditions and promoting healthy growth. This guide will walk you through the process of building your own cold frame from scratch, providing detailed instructions and helpful tips along the way.

Understanding the Basics of Cold Frames

A cold frame is essentially a miniature greenhouse, consisting of a box-like structure with a transparent lid. The transparent lid, usually made of glass or plastic, allows sunlight to penetrate while trapping heat inside. This creates a warmer environment than the surrounding air, allowing you to start seeds earlier in the season or protect tender plants from frost and harsh weather.

Benefits of Using a Cold Frame

There are numerous advantages to using a cold frame:

  • Extended Growing Season: Cold frames provide a head start for seedlings and allow you to harvest crops earlier in the spring and later in the fall.
  • Protection from Harsh Weather: Cold frames shield plants from frost, wind, and excessive rain, ensuring their survival in challenging conditions.
  • Improved Seed Germination: The consistent warmth and humidity within a cold frame create ideal conditions for seed germination, increasing success rates.
  • Hardening Off Seedlings: Cold frames allow you to gradually acclimate seedlings to outdoor conditions before transplanting them into the garden.
  • Increased Plant Productivity: By providing a controlled environment, cold frames can significantly boost plant growth and yield.
  • Cost-Effective: Building a cold frame is relatively inexpensive, especially compared to purchasing a pre-made greenhouse.

Choosing the Right Location and Materials

The success of your cold frame hinges on choosing the right location and materials. Consider the following factors:

Location

  • Sunlight: Select a location that receives at least six hours of direct sunlight daily, preferably facing south for maximum sun exposure.
  • Drainage: Choose a well-drained area to prevent waterlogging, which can damage plant roots.
  • Accessibility: Position your cold frame in an area that is easily accessible for watering, weeding, and harvesting.
  • Protection from Wind: Consider placing the cold frame against a wall or fence for wind protection, especially in windy regions.

Materials

  • Framing: Use durable and weather-resistant materials like pressure-treated lumber, cedar, or redwood for the frame. Avoid using untreated softwoods, as they are susceptible to rot.
  • Covering: Choose a transparent material that allows sunlight penetration while trapping heat. Glass is an excellent option for durability and insulation, but it can be heavy. Polycarbonate panels offer a lightweight and durable alternative. Plastic sheeting is a budget-friendly choice, but it may require replacement more frequently.
  • Insulation: Consider adding insulation to the bottom and sides of the cold frame, especially if you live in a cold climate. This will help maintain a more consistent temperature inside.

Step-by-Step Instructions for Building a Cold Frame

Now that you have a good understanding of the basics, let's dive into the construction process. Follow these steps to build a simple but effective cold frame:

Step 1: Prepare the Base

  • Measure and Cut Lumber: Determine the desired size of your cold frame and cut the lumber accordingly for the base, sides, and lid frame.
  • Assemble the Base: Using screws or nails, construct a rectangular base for the cold frame. Ensure the base is level and sturdy.
  • Install Insulation (Optional): If you are using insulation, attach it to the bottom of the base for added warmth.

Step 2: Build the Sides and Lid Frame

  • Construct Sides: Cut and attach the side pieces to the base, creating a box-like structure.
  • Build the Lid Frame: Cut and assemble the lid frame using lumber of the same size as the sides.
  • Install Hinges: Attach hinges to the lid frame, allowing it to open and close easily.
  • Install Insulation (Optional): If you are using insulation, attach it to the inside of the sides and the lid frame for maximum heat retention.

Step 3: Attach the Covering

  • Choose Covering: Select your desired covering materialâ€"glass, polycarbonate panels, or plastic sheetingâ€"based on your budget and climate.
  • Secure the Covering: If using glass, carefully attach it to the lid frame using glazing points and putty for a weatherproof seal. For polycarbonate panels or plastic sheeting, use screws or clips designed for the material.
  • Install a Vent: Create a vent in the lid to regulate air circulation and prevent overheating. This can be a simple sliding panel or a hinged flap.

Step 4: Final Touches

  • Painting (Optional): Paint the exterior of the cold frame to protect the wood and enhance its appearance.
  • Add a Handle: Attach a handle to the lid for easy opening and closing.
  • Prepare the Soil: Fill the cold frame with a good quality potting mix or garden soil. Ensure the soil is well-drained.

Maintaining Your Cold Frame

Once your cold frame is built, proper maintenance is crucial for its longevity and effectiveness. Follow these tips:

  • Regularly Check for Leaks: Monitor the covering for any cracks or tears, and promptly repair them to prevent water damage.
  • Control Temperature: Adjust the vent to regulate temperature, allowing for air circulation and preventing overheating.
  • Water Regularly: Water your plants as needed, ensuring the soil remains moist but not waterlogged.
  • Remove Weeds: Regularly remove weeds to prevent competition for resources.
  • Clean the Covering: Keep the covering clean and free of debris to maximize sunlight penetration.

Creative Cold Frame Designs

While the basic design outlined above is a great starting point, you can personalize your cold frame to suit your needs and style. Here are some ideas:

  • Double-Walled Cold Frame: Add a second layer of wood and insulation to the sides for enhanced temperature control.
  • Raised Cold Frame: Elevate the base for easier access and better drainage.
  • Lean-To Cold Frame: Attach the cold frame to a wall or fence for additional stability and wind protection.
  • Portable Cold Frame: Build a smaller, lightweight cold frame that can be moved easily to different locations.

Conclusion

Building a cold frame is a rewarding project that can significantly enhance your gardening experience. With the right materials, careful planning, and attention to detail, you can create a durable and effective cold frame that extends your growing season and protects your plants from harsh weather conditions. By following these instructions and incorporating your own creative touches, you can enjoy the benefits of a homemade cold frame for years to come.