Modern cabinet designs for contemporary woodworking projects
Modern Cabinet Designs for the Contemporary Woodworker

The contemporary woodworking scene thrives on innovation, pushing the boundaries of traditional techniques to create stunning, functional pieces. Nowhere is this more evident than in cabinet design. Gone are the days of strictly utilitarian boxes; modern cabinets are statement pieces, blending sleek aesthetics with meticulous craftsmanship. This article explores the key design elements shaping modern cabinet trends and offers inspiration for your next woodworking project.

Minimalist Aesthetics: Less is More

Minimalism reigns supreme in contemporary design, and cabinetmaking is no exception. Clean lines, simple geometries, and a restrained use of ornamentation characterize this style. Think flush-mounted doors and drawers, devoid of excessive hardware. Natural wood grains take center stage, showcasing the beauty of the material itself. A focus on functionality ensures that every element serves a purpose, avoiding unnecessary embellishments. This approach demands precision in joinery, highlighting the skill and artistry of the woodworker. The result? A cabinet that's both strikingly elegant and effortlessly sophisticated.

Material Explorations: Beyond Traditional Woods

While hardwoods like walnut, cherry, and oak remain popular choices, modern cabinetmakers are increasingly experimenting with a wider range of materials. Metal accents, such as steel or brass, add a touch of industrial chic, contrasting beautifully with the warmth of wood. Concrete, with its raw texture and modern appeal, finds its place in unique cabinet designs. Even reclaimed wood, brimming with character and history, lends itself to a rustic-modern aesthetic. The strategic combination of these materials creates visually striking and texturally rich pieces. Experimentation is key; consider the interplay of colors, textures, and finishes to achieve a unique visual impact.

Integrating Technology: Smart Storage Solutions

Modern cabinet design isn't just about aesthetics; it's about functionality enhanced by technology. Think integrated charging stations for mobile devices, hidden compartments with automated mechanisms, and smart lighting systems within the cabinet itself. These features add a layer of convenience and sophistication, transforming the cabinet from a simple storage unit into a highly functional and technologically advanced piece of furniture. This integration requires careful planning and execution, but the rewards are undeniable.

Handle-less Design: Sleek and Seamless

Handle-less cabinets epitomize modern minimalism. The absence of traditional knobs or pulls creates a seamless, uninterrupted surface, enhancing the clean lines and uncluttered aesthetic. Instead of handles, designers employ various ingenious solutions: push-to-open mechanisms, recessed grooves for finger pulls, or even cleverly integrated channels for opening doors and drawers. This requires precise craftsmanship to ensure smooth and reliable operation, but the payoff is a cabinet that feels both luxurious and effortlessly modern.

Beyond the Box: Creative Cabinetry

Contemporary cabinet design is pushing boundaries, moving beyond the traditional rectangular box. Curved doors, asymmetrical shapes, and unconventional layouts are becoming increasingly popular. These designs challenge traditional woodworking techniques, demanding creativity and a willingness to experiment. Consider incorporating these unique shapes to add a bold statement to any space. The possibilities are limitless, encouraging woodworkers to express their individual style and innovation.

Exploring Unique Finishes

The final touch on any modern cabinet is the finish. Beyond traditional stains and lacquers, modern finishes offer a wide range of options: matte finishes for a subtle, understated look; high-gloss finishes for a dramatic, reflective surface; or even textured finishes that add depth and visual interest. The choice of finish significantly impacts the overall aesthetic, so carefully consider how it will complement the chosen materials and design elements.

Modern cabinet design offers a thrilling canvas for the contemporary woodworker. By embracing minimalist aesthetics, exploring diverse materials, and incorporating innovative techniques, you can craft stunning and functional pieces that reflect both your skills and the ever-evolving world of design.

Free chaise lounge blueprints for comfortable furniture projects

Free Chaise Lounge Blueprints for Comfortable Furniture Projects

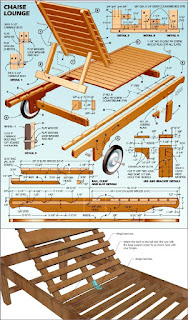
The following document provides detailed information and considerations for crafting comfortable chaise lounges using freely available blueprints. While precise blueprints are not directly provided within this text due to the complexities of digital blueprint distribution and copyright concerns, this guide will furnish you with the necessary information to locate suitable plans, adapt them to your needs, and successfully construct a high-quality chaise lounge. We will explore various design elements critical to both aesthetic appeal and ergonomic comfort.

Understanding Chaise Lounge Design Fundamentals

Before embarking on a chaise lounge construction project, a thorough understanding of its design elements is paramount. A well-designed chaise lounge balances aesthetic appeal with functional comfort, offering a relaxing and supportive seating experience. Key considerations include:

Ergonomics and Comfort

The foundation of any comfortable chaise lounge lies in its ergonomic design. The angle of the backrest and the seat's depth significantly impact user comfort. A gently sloping backrest (typically between 110° and 120°) supports the natural curvature of the spine, while a properly proportioned seat depth ensures adequate leg and hip support without restricting blood flow. The lumbar support is crucial; an inadequately supported lower back will result in discomfort during prolonged use. Consider incorporating adjustable features for personalized comfort levels.

Materials Selection

Material selection greatly influences both the aesthetic and functional aspects of the chaise lounge. The choice of wood, upholstery fabric, and padding significantly impacts the longevity, comfort, and overall style of the finished product. Hardwoods like oak, mahogany, or walnut offer durability and an elegant appearance, while softer woods like pine might be more budget-friendly but require careful handling to avoid damage. Upholstery fabrics range from durable cotton and linen to luxurious velvet and leather, each providing unique aesthetic and textural qualities. Similarly, the density and thickness of padding directly affect the chaise lounge's comfort and support.

Structural Integrity

The structural integrity of the chaise lounge is paramount for safety and longevity. The frame should be robust enough to withstand regular use and weight without flexing or compromising its stability. Proper joinery techniques, such as mortise and tenon or dowel joints, are essential for building a durable and stable frame. The use of appropriate fasteners, such as screws and bolts, further enhances structural integrity. Consider the load-bearing capacity of chosen materials when selecting dimensions and designs.

Locating and Adapting Free Blueprints

While direct blueprint provision is not possible within this document, numerous online resources offer free furniture plans. These range from basic designs to more complex, detailed plans. Utilize search engines such as Google, Bing, or DuckDuckGo using keywords such as "free chaise lounge plans," "DIY chaise lounge blueprints," or "free woodworking plans chaise lounge." Explore online woodworking communities and forums where users share their projects and potentially offer plans. Websites dedicated to DIY projects and furniture making often provide free blueprints and tutorials.

Adapting existing blueprints might be necessary to match your preferences or available materials. You may need to adjust the dimensions, modify the design elements, or substitute materials based on your needs. When adapting plans, ensure the structural integrity remains uncompromised. Any significant alterations should be carefully considered, possibly requiring structural calculations to ensure the stability of the modified design. Always double-check dimensions and measurements before cutting and assembling the components.

Essential Tools and Materials

Constructing a chaise lounge requires a range of tools and materials, the specifics of which depend heavily on the chosen blueprint. However, a general list includes:

Tools

  • Measuring tape
  • Pencil
  • Saw (hand saw, circular saw, or jigsaw)
  • Drill
  • Screwdriver
  • Sandpaper (various grits)
  • Clamps
  • Wood glue
  • Staple gun (for upholstery)
  • Safety glasses
  • Dust mask

Materials

  • Wood (type and quantity depend on the blueprint)
  • Screws and bolts
  • Wood glue
  • Upholstery fabric
  • Foam padding
  • Batting or fiberfill
  • Staples
  • Finishing materials (stain, paint, varnish)

This list is not exhaustive and may need adjustments depending on the complexity and design of your chosen chaise lounge blueprint. Remember to consult the specific blueprint for a complete and accurate list of necessary tools and materials.

Construction Process and Safety Precautions

The construction process follows the instructions provided in your chosen blueprint. Generally, it involves cutting the wood components to the specified dimensions, assembling the frame using appropriate joinery techniques and fasteners, attaching the padding and upholstery, and finally, finishing the chaise lounge with stain, paint, or varnish.

Safety is paramount throughout the entire construction process. Always wear safety glasses and a dust mask to protect your eyes and respiratory system from wood dust and flying debris. Use caution when operating power tools and always follow the manufacturer's instructions. Ensure proper ventilation when working with paints, stains, or varnishes. Clamp work pieces securely before cutting or drilling to prevent accidents. Take breaks to avoid fatigue and maintain focus. If unsure about any step, consult a more experienced woodworker or seek professional guidance.

Finishing Touches and Customization

Once the chaise lounge is assembled, apply the finishing touches to enhance its aesthetic appeal and durability. Sanding the wood to a smooth finish before applying stain, paint, or varnish is crucial for a professional look. Choose a finish that complements the style and color scheme of your space and adequately protects the wood from wear and tear. Consider adding decorative elements, such as decorative pillows or throws, to enhance comfort and personalize the chaise lounge to reflect your taste.

Remember, successful completion of your chaise lounge project requires careful planning, precise execution, and attention to detail. This guide serves as a comprehensive introduction to the process. Thorough research, careful selection of blueprints, and diligent adherence to safety precautions will greatly increase the likelihood of a successful and enjoyable DIY project resulting in a comfortable and stylish chaise lounge for years to come.

Dado Cuts vs. Grooves: Understanding the Difference

Dado Cuts vs. Grooves: Understanding the Difference

Dado Cuts vs. Grooves: Understanding the Difference

In the realm of woodworking, precision and accuracy are paramount. Achieving these goals often relies on the proper execution of cuts and grooves. Two frequently encountered terms that may seem synonymous, yet hold distinct meanings, are dado cuts and grooves. This article aims to clarify the differences between these two woodworking techniques, exploring their applications, advantages, and limitations.

Understanding Dado Cuts

A dado cut, also known as a dado joint, is a rectangular groove or slot cut across the width of a piece of wood. It is typically used to accommodate the thickness of another piece of wood, creating a strong and secure joint. The depth of a dado cut is designed to match the thickness of the material being inserted, ensuring a tight fit.

Types of Dado Cuts

Dado cuts can be classified into several types, each serving a specific purpose:

  • Through Dado: This type of dado cut extends completely through the width of the wood, creating a channel for inserting another piece of wood.
  • Stopped Dado: As the name suggests, a stopped dado cut is stopped before reaching the end of the wood, creating a groove with a defined length. This is particularly useful for creating shelves or other structural elements within a larger piece of wood.
  • Blind Dado: In a blind dado cut, the groove is made without completely passing through the wood, creating a concealed joint. This type of cut is often used for creating drawers or other hidden features.

Applications of Dado Cuts

Dado cuts find widespread application in various woodworking projects, including:

  • Cabinet Construction: Dado cuts are essential for creating strong and stable joints in cabinet construction, especially for shelves, drawer sides, and back panels.
  • Furniture Making: Dado joints are commonly used in furniture construction to create sturdy and aesthetically pleasing joints for legs, drawers, and other components.
  • Picture Frames: Dado cuts can be utilized to create picture frame rabbets, which provide a recess for the glass and artwork.
  • Moulding Applications: Dado cuts can be employed to create slots for installing moulding or trim, enhancing the visual appeal and functionality of a project.

Exploring Grooves

In contrast to dado cuts, a groove refers to a linear indentation or channel cut into the surface of wood, typically running along the grain. Unlike dados, grooves are usually narrower and shallower, serving a variety of purposes. Grooves are often used to create a decorative effect, provide a channel for routing cables, or create a smooth surface for sliding objects.

Types of Grooves

Grooves can be classified into different types based on their shape and purpose:

  • Rabbet Groove: A rabbet groove is a rectangular groove cut along the edge of a piece of wood, typically used for creating a joint for joining two pieces of wood at a right angle.
  • Bead Groove: A bead groove features a rounded or semi-circular profile, often used for decorative purposes or to create a channel for sliding a door.
  • Tongue and Groove Joint: This type of groove involves cutting a protruding tongue on one piece of wood and a corresponding groove on another piece. When joined, the tongue fits into the groove, creating a tight and strong connection.

Applications of Grooves

Grooves are widely used in various woodworking projects, including:

  • Flooring Installation: Tongue and groove joints are a standard feature in flooring installation, allowing for the seamless connection of individual boards.
  • Paneling: Grooves are often incorporated into paneling to create a visually appealing and cohesive design, while also providing a space for running wires or cables.
  • Door and Window Frames: Grooves are commonly used to create channels for installing glazing beads or weather stripping in door and window frames.
  • Furniture Design: Grooves can be used to create decorative details in furniture, such as chair rails, table legs, or drawer fronts.

Key Differences Between Dado Cuts and Grooves

While both dado cuts and grooves involve cutting channels into wood, they differ significantly in their shape, size, and purpose. Here's a breakdown of the key distinctions:

  • Shape: Dado cuts are rectangular grooves, while grooves can be rectangular, rounded, or have other profiles.
  • Size: Dado cuts are typically wider and deeper than grooves, designed to accommodate the thickness of another piece of wood.
  • Purpose: Dado cuts primarily serve as joints for connecting pieces of wood, while grooves are more versatile, used for decorative elements, cable routing, or creating sliding surfaces.

Tools for Creating Dado Cuts and Grooves

Both dado cuts and grooves can be created using a variety of tools, depending on the project requirements and the level of precision desired. Some common tools include:

  • Table Saw: A table saw equipped with a dado blade is ideal for creating dado cuts, especially for large or precise projects.
  • Router: A router can be used to create dado cuts and a wide range of grooves by using various router bits.
  • Hand Router: A hand router offers greater flexibility for creating dado cuts and grooves in awkward or tight spaces.
  • Dado Stack: A dado stack is a set of stacked blades designed specifically for cutting dado cuts on a table saw.
  • Groove Cutter: A groove cutter is a specialized router bit designed to create grooves with a specific profile.

Advantages and Limitations of Dado Cuts and Grooves

Both dado cuts and grooves have their own advantages and limitations, depending on the specific application. Understanding these aspects can help you choose the best technique for your project.

Advantages of Dado Cuts

  • Strong and Secure Joint: Dado cuts create a strong and secure joint, especially when used in cabinet construction or furniture making.
  • Aesthetically Pleasing: Dado joints can enhance the visual appeal of a project, providing a clean and professional look.
  • Versatility: Dado cuts can be used for a wide range of applications, from creating shelves to installing molding.

Limitations of Dado Cuts

  • Requires Specialized Tools: Creating dado cuts often requires specialized tools like a table saw or dado stack, which can be expensive.
  • Can be Time-Consuming: Depending on the size and complexity of the dado cut, creating it can be time-consuming.
  • Potential for Tear-Out: If not done properly, dado cuts can result in tear-out, especially in soft woods.

Advantages of Grooves

  • Versatility: Grooves can be used for a wide range of applications, from decorative elements to cable routing.
  • Easy to Create: Grooves can be created using various tools, including routers, hand routers, and groove cutters.
  • Aesthetic Appeal: Grooves can add visual interest to a project, enhancing its overall design.

Limitations of Grooves

  • May Not Be As Strong as Dado Cuts: Grooves are typically not as strong as dado cuts, especially for structural applications.
  • Limited Depth: Grooves are generally shallower than dado cuts, limiting their ability to accommodate thick pieces of wood.
  • Can Be Difficult to Cut Precisely: Creating a groove with a consistent depth and profile can be challenging for beginners.

Conclusion

In summary, dado cuts and grooves are distinct woodworking techniques that serve different purposes. Dado cuts create rectangular grooves for creating strong joints, while grooves can be rectangular, rounded, or have other profiles and serve a variety of applications, including decoration, cable routing, and sliding surfaces. Understanding the advantages and limitations of each technique allows you to choose the most suitable method for your woodworking project. By mastering these techniques, you can achieve the desired precision and create stunning and functional woodworking projects.

How to Make Functional and Beautiful Wooden Plant Stands for Homeowners

How to Make Functional and Beautiful Wooden Plant Stands for Homeowners

Elevate Your Greenery: Crafting Functional & Beautiful Wooden Plant Stands

Breathe life into your home with the vibrant presence of plants, and enhance their charm with custom-crafted wooden plant stands. These creations are more than just a place to rest your pots; they're a statement of your style, a testament to your DIY skills, and an opportunity to bring warmth and personality to your living spaces.

Choosing the Right Wood

The journey begins with selecting the perfect wood. Consider the aesthetic and practical aspects:

Durability and Strength

Opt for hardwoods like oak, maple, or walnut for their resilience and ability to withstand the weight of larger plants. These woods offer natural beauty and a timeless elegance.

Aesthetic Appeal

Softwoods like pine or cedar provide a lighter, more rustic charm. Their lighter hues and natural knots can complement certain décor styles. Remember, you can always stain or paint the wood to match your desired aesthetic.

Designing Your Plant Stand

The next step is to unleash your creativity. Sketch out your vision, considering:

Shape and Size

Think about the space you're working with and the size of your plants. A single-tier stand might be perfect for a small succulent, while a multi-tier design can showcase a collection of plants.

Style and Features

Do you prefer a simple, minimalist design or something more elaborate with curves and intricate details? Consider adding shelves, drawers, or even wheels for mobility.

The Building Process

Armed with your design and chosen wood, gather the necessary tools:

  • Saw (circular, jigsaw, or handsaw)
  • Drill and drill bits
  • Screwdriver or impact driver
  • Sandpaper (various grits)
  • Measuring tape and pencil
  • Clamps (optional)
  • Wood glue (optional)
  • Finishing materials (stain, paint, sealant)

Follow these steps:

Cutting and Shaping

Use your saw to cut the wood into the required dimensions based on your design. Ensure clean and accurate cuts for a professional finish.

Assembly

Assemble the pieces using wood glue and screws, ensuring all joints are secure. Clamps can help hold pieces together while the glue dries.

Sanding

Smooth out any rough edges and imperfections using sandpaper. Start with coarser grits and progressively move to finer grits for a smooth surface.

Finishing Touches

Enhance the beauty of your plant stand with stain, paint, or sealant. Choose finishes that complement your home décor and protect the wood from moisture and wear.

Adding Personal Flair

Don't be afraid to add your own personality. Here are some ideas:

  • Carve intricate designs or add decorative elements like metal accents.
  • Paint the stand in vibrant colors or apply a rustic, weathered finish.
  • Embellish the stand with decorative knobs, handles, or even upcycled materials.

Your handcrafted wooden plant stands will not only showcase your green companions but also serve as beautiful and functional additions to your home, reflecting your unique taste and craftsmanship.

Easy Woodworking Projects for Beginners with Step-by-Step Instructions

Easy Woodworking Projects for Beginners with Step-by-Step Instructions

Easy Woodworking Projects for Beginners with Step-by-Step Instructions

Woodworking is a rewarding hobby that offers a sense of accomplishment and the opportunity to create beautiful and functional pieces. If you're a beginner, starting with simple projects is key to building your skills and confidence. This guide will provide you with step-by-step instructions for several easy woodworking projects that are perfect for beginners.

Essential Tools and Materials

Before embarking on any woodworking project, it's crucial to have the necessary tools and materials. While the specific tools may vary depending on the project, here's a basic set that will get you started:

  • Measuring Tape: Essential for accurate measurements.
  • Pencil: For marking lines and transferring measurements.
  • Hand Saw: Used for cutting wood to size.
  • Hammer: For driving nails and securing pieces together.
  • Screwdriver: To fasten screws.
  • Wood Glue: Used for bonding wood pieces.
  • Safety Glasses: To protect your eyes from flying debris.
  • Work Gloves: To protect your hands.
  • Clamps: To hold pieces together while they are being glued or screwed.
  • Sandpaper: For smoothing surfaces and removing imperfections.

In addition to these essential tools, you'll need to select the appropriate wood for your project. Pine, plywood, and MDF are common choices for beginners due to their affordability and ease of workability.

Simple Woodworking Projects for Beginners

1. Wooden Coasters

Wooden coasters are a practical and stylish addition to any home. This project is simple and allows you to practice basic woodworking techniques.

  1. Cut the Wood: Using a handsaw or a circular saw, cut 4-inch square pieces from your chosen wood. You'll need as many pieces as you want coasters.
  2. Sand the Edges: Smooth the edges of the squares using sandpaper. Start with coarse-grit sandpaper and finish with fine-grit for a smooth finish.
  3. Apply Finish (Optional): You can stain or paint the coasters for a personalized touch. If you prefer a natural look, apply a sealant to protect the wood.
  4. Attach Felt Pads: Use wood glue or adhesive to attach felt pads to the bottom of each coaster. These will prevent scratches on your surfaces.

2. Simple Picture Frame

A picture frame is a classic woodworking project that allows you to showcase your favorite photos or artwork.

  1. Measure and Cut the Wood: Measure the dimensions of your photo or artwork. Cut four pieces of wood to create the frame's perimeter, allowing for a slight overlap at the corners.
  2. Join the Corners: Use wood glue and clamps to join the four pieces of wood at the corners, ensuring they are square and flush.
  3. Secure the Joints: Once the glue has dried, reinforce the corners by driving nails or screws through the mitered joints.
  4. Sand and Finish: Sand the frame to remove any rough edges. Apply a stain or paint to personalize the frame.
  5. Attach the Back: Cut a piece of plywood or cardboard to fit inside the frame. Use glue or small nails to attach the back panel.
  6. Install Hardware: Attach picture-hanging hardware to the back of the frame.

3. Wooden Cutting Board

A wooden cutting board is a useful addition to any kitchen. This project requires a bit more work but is still manageable for beginners.

  1. Select and Cut the Wood: Choose a hardwood such as maple or walnut for its durability. Cut the wood to your desired size and shape. If you want a rectangular board, use a handsaw or circular saw. For a more intricate shape, consider using a jigsaw.
  2. Sand the Surface: Sand the surface of the cutting board thoroughly. Start with coarse-grit sandpaper and work your way to fine-grit to achieve a smooth finish.
  3. Apply Mineral Oil (Optional): Mineral oil is a common sealant for cutting boards. Apply it liberally to the surface and allow it to dry for several hours. Repeat this process as needed.
  4. Add a Handle (Optional): For a more comfortable grip, you can attach a wooden handle to the cutting board. Use wood glue and clamps to secure the handle.

4. Wooden Birdhouse

Building a birdhouse is a fun and rewarding project for beginners. It's an excellent opportunity to work with different wood shapes and learn about basic construction techniques.

  1. Choose a Design: There are countless birdhouse designs online and in books. Select one that appeals to you and is appropriate for the birds in your area.
  2. Cut the Wood: Cut the wood pieces according to the design specifications. Use a handsaw, jigsaw, or scroll saw for intricate cuts.
  3. Assemble the Birdhouse: Use wood glue and nails or screws to assemble the various components of the birdhouse. Make sure to create a snug fit to keep out rain and drafts.
  4. Add the Roof: Attach the roof using glue, nails, or screws. You may want to use hinges to create a removable roof for easy cleaning.
  5. Install a Perch and Entrance Hole: Attach a wooden perch and drill the entrance hole according to the design specifications.
  6. Paint or Stain (Optional): Paint or stain the birdhouse for a more attractive look. Use non-toxic paints or stains that are safe for birds.

Tips for Success

Woodworking can be an enjoyable hobby, but it's important to approach it with safety and patience.

  • Read the Instructions Carefully: Before you start any project, make sure you understand the steps and materials required. Read the instructions thoroughly and refer to them frequently.
  • Start Small: Begin with simple projects and gradually move on to more complex ones as you gain confidence.
  • Practice Safety: Always wear safety glasses and gloves when working with woodworking tools. Use caution and follow proper safety guidelines to avoid injuries.
  • Take Your Time: Woodworking is a craft that requires patience and precision. Don't rush the process and allow adequate time for each step.
  • Don't Be Afraid to Ask for Help: If you encounter difficulties, don't hesitate to ask for help from a more experienced woodworker or consult online resources.

Conclusion

Woodworking is a rewarding and creative hobby that can be enjoyed by people of all ages and skill levels. With these easy woodworking projects, you can unleash your inner craftsman and create beautiful and functional pieces for yourself or as gifts for others. Remember to start small, practice safety, and have fun along the way.

How to Make Wooden Candle Holders with an Industrial Feel

How to Make Wooden Candle Holders with an Industrial Feel

Crafting Industrial Chic: A Guide to Making Wooden Candle Holders

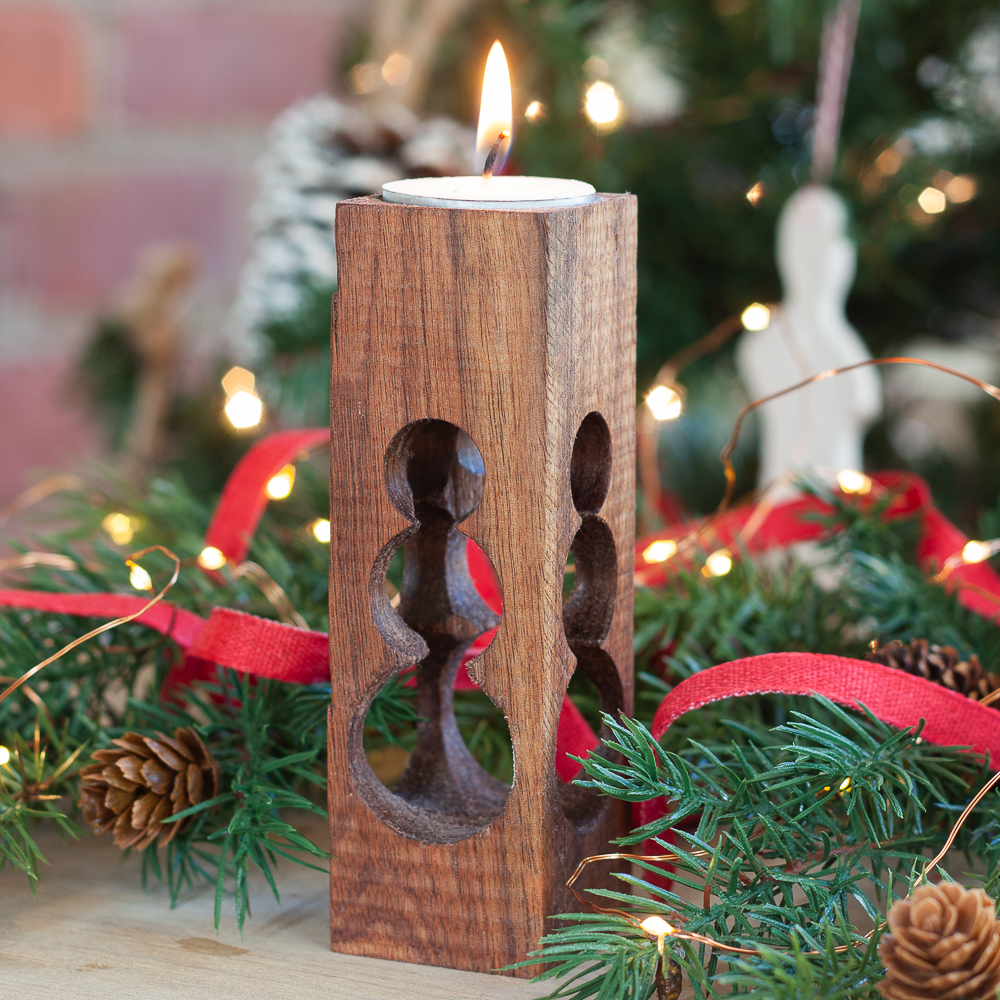
In the realm of home decor, the industrial aesthetic has emerged as a timeless trend, characterized by its raw, utilitarian beauty and a touch of rugged charm. Wooden candle holders, with their inherent warmth and natural appeal, can be seamlessly integrated into this style, adding a touch of sophistication and ambiance to any space. This comprehensive guide will equip you with the knowledge and techniques to create your own industrial-inspired wooden candle holders, transforming ordinary wood into captivating home accents.

Materials and Tools

Before embarking on your crafting journey, gather the necessary materials and tools. This will ensure a smooth and efficient process:

Materials:

  • Wooden blocks or planks: Choose wood with a rustic or reclaimed look, such as reclaimed barn wood, pine, or oak. The thickness of the wood should be sufficient to accommodate the candle size.
  • Candles: Select candles that complement the size and style of your wooden holders. Consider varying heights and diameters to add visual interest.
  • Wood glue:
  • Sandpaper: Use different grits, from coarse to fine, to smooth the wood and create a desired finish.
  • Wood stain or paint: Select colors that align with the industrial aesthetic, such as dark browns, grays, or metallics. Consider using a clear sealant for a protective finish.
  • Metal hardware: Industrial-inspired hardware such as screws, bolts, washers, or brackets can add a touch of authenticity and visual interest.
  • Protective gloves and safety goggles:

Tools:

  • Saw: A handsaw, jigsaw, or circular saw for cutting the wood to desired dimensions.
  • Drill: For creating holes for candles and attaching hardware.
  • Clamps: To secure the wood during cutting or gluing.
  • Measuring tape and pencil: For marking and precise cutting.
  • Hammer: For securing hardware.
  • Paintbrushes or rags: For applying stain or paint.

Step-by-Step Guide: Creating Your Industrial Wooden Candle Holders

Follow these step-by-step instructions to craft your unique industrial wooden candle holders:

Step 1: Design and Preparation

Begin by visualizing the design of your candle holders. Consider factors such as the shape, size, and number of holders you want to create. Sketch out your ideas and measure the dimensions of your chosen wooden blocks or planks. Ensure that the dimensions are compatible with the size of your candles.

Step 2: Cutting and Shaping

Using your chosen saw, carefully cut the wooden blocks or planks to the desired size and shape. For a more rustic and industrial look, consider leaving some natural edges or imperfections. If creating multiple holders, ensure consistency in their dimensions.

Step 3: Sanding and Finishing

Once you have cut and shaped the wood, it's time to smooth the surface with sandpaper. Start with a coarse grit to remove any rough edges or imperfections. Gradually progress to finer grits for a smoother finish. Consider using a sanding block for more control and a consistent finish.

Step 4: Creating Candle Wells

Use a drill with a bit slightly larger than the diameter of your candles to create holes for the candle wells. Be careful not to drill all the way through the wood. The depth of the hole should be slightly less than the height of the candle.

Step 5: Stain or Paint

Apply your chosen wood stain or paint to the wooden holders. Use a brush or rag to evenly distribute the stain or paint, allowing it to penetrate the wood. Consider applying multiple coats for a richer color and a more durable finish.

Step 6: Adding Hardware

Attaching metal hardware can add a touch of industrial charm and provide a secure base for your candle holders. Use your drill to create pilot holes for screws or bolts. Secure the hardware with a hammer and ensure a firm hold.

Step 7: Protective Finish

To enhance the durability and protect the finish of your candle holders, consider applying a clear sealant. This will prevent spills or water damage, ensuring that your creations remain beautiful for years to come.

Industrial Style Tips

To elevate the industrial feel of your wooden candle holders, consider incorporating these styling tips:

  • Reclaimed Wood: Utilize wood with a history, such as reclaimed barn wood, for an authentic industrial look. Its natural imperfections and weathered patina add character and depth.
  • Metallic Accents: Incorporate metallic hardware, such as screws, bolts, or brackets, for a rugged and industrial touch. Choose finishes like brushed nickel, brass, or copper to complement the wooden base.
  • Dark and Earthy Tones: Opt for dark wood stains or paints, such as dark browns, grays, or blacks, to create a moody and sophisticated ambiance.
  • Distressed Finish: Consider distressing the surface of the wood by lightly sanding or using a wire brush to create a worn and aged look.
  • Unusual Shapes: Explore unique shapes and forms for your candle holders, like asymmetrical designs or angular pieces. Experiment with different combinations of wood sizes and shapes to create visual interest.
  • Groupings and Arrangements: Arrange multiple candle holders of varying sizes and shapes together to create a captivating focal point. Groupings of three or five holders can create a visually striking and balanced display.

Conclusion

Creating industrial-inspired wooden candle holders is a rewarding and creative endeavor that allows you to infuse your home with a unique touch. By following the step-by-step guide and embracing the industrial style tips, you can transform ordinary wood into captivating home accents that exude both warmth and modern sophistication. Embrace your creativity and enjoy the process of crafting these beautiful and functional pieces that will enhance the ambiance of your space for years to come.

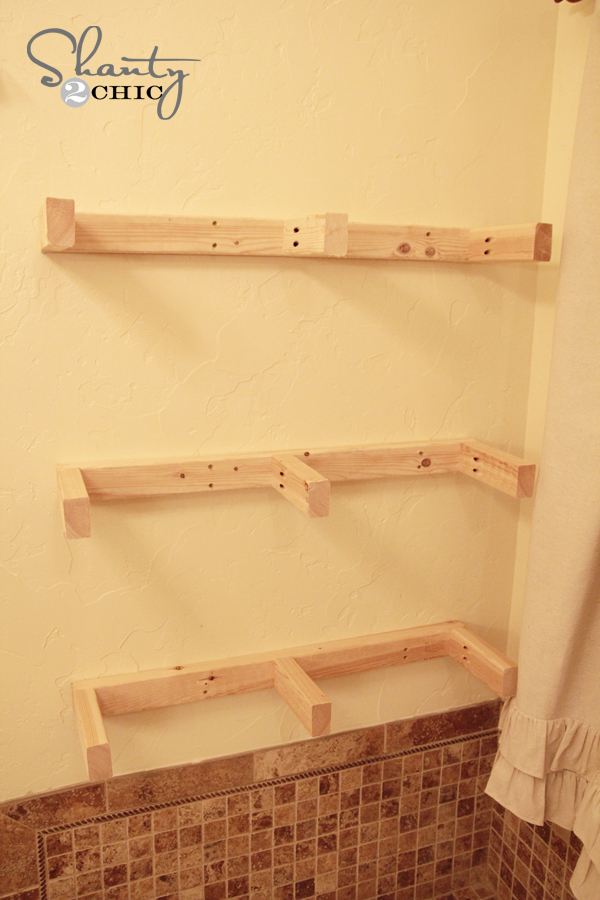
DIY Floating Shelves: How to Build and Customize Your Own Wall Storage

DIY Floating Shelves: How to Build and Customize Your Own Wall Storage

DIY Floating Shelves: How to Build and Customize Your Own Wall Storage

Tired of bulky bookshelves taking up precious floor space? Ready to elevate your home decor with a modern, minimalist touch? Then it's time to embark on a DIY adventure and build your own floating shelves! These stylish and functional storage solutions are easier to create than you might think, offering a fantastic way to personalize your space and showcase your favorite belongings.

This guide will walk you through the entire process, from choosing materials and planning your design to installing your masterpiece. Get ready to unleash your inner builder and transform your walls into stunning storage havens.

Planning Your Floating Shelf Project

Before you grab your tools and get sawing, it's crucial to plan your floating shelves. Consider these factors:

1. Determine Shelf Size and Number

Measure the space you want to fill and decide on the dimensions of your shelves. For smaller items like plants and photo frames, a 12-inch depth might suffice. For larger items like books or decorative pieces, you'll need a deeper shelf (18-24 inches). Consider the number of shelves you want and their placement to create a balanced and visually appealing design.

2. Choose Your Materials

The material you choose for your shelves will determine their style and weight capacity. Popular options include:

  • Wood: Durable, versatile, and available in various finishes. Pine and plywood are budget-friendly choices, while hardwoods like maple and oak offer greater strength and elegance.
  • Metal: Sleek and modern, offering a clean industrial aesthetic. Steel, iron, and aluminum are popular choices.
  • Glass: Adds a touch of sophistication and makes objects appear to float. Ensure you choose tempered glass for safety and strength.

3. Decide on Shelf Brackets

The brackets will hold the weight of your shelves and determine their overall appearance. Consider options like:

  • Metal L-brackets: Simple, affordable, and offer strong support.
  • Decorative Brackets: Add a touch of flair with ornate or industrial-style brackets.
  • Hidden Brackets: Create a clean, seamless look by concealing the brackets behind the shelves.

Gathering Your Tools and Materials

Once your plan is in place, gather your tools and materials. You'll need:

  • Saw: A circular saw or table saw for cutting the wood. A jigsaw can be used for intricate cuts.
  • Drill: With various drill bits, including countersinking bits for screws.
  • Screwdriver: For attaching brackets and securing the shelves.
  • Tape Measure: For precise measurements.
  • Level: To ensure your shelves are perfectly straight.
  • Pencil: For marking your cuts and placement.
  • Sandpaper: For smoothing out any rough edges.
  • Wood Glue: For extra support and stability (optional).
  • Wood Stain or Paint: To enhance the appearance and protect the wood.
  • Protective Gloves and Eyeglasses: For safety.

Building the Shelves

With your tools and materials ready, let's get building!

1. Cut the Wood

Using your tape measure, mark the desired length and width of your shelves on the wood. Make precise cuts with your chosen saw. Ensure the cuts are straight and clean.

2. Sand the Edges

Smooth out any rough edges or imperfections on the shelf surfaces and edges using sandpaper. Sand in the direction of the wood grain for the best results.

3. Stain or Paint (Optional)

If you want to enhance the appearance or protect the wood, apply a stain or paint. Choose a color that complements your decor. Let the finish dry completely before moving on.

Installing the Shelves

Now comes the fun part â€" installing your floating shelves!

1. Mark the Bracket Placement

Hold the brackets against the wall where you want to place the shelves. Use a pencil to mark the locations for the screws. Remember to consider the thickness of the shelf when marking the placement.

2. Drill Pilot Holes

Drill pilot holes at the marked locations for the screws. This will prevent the wood from splitting when you screw in the brackets.

3. Install the Brackets

Secure the brackets to the wall using screws. Use a level to ensure the brackets are straight and even. Drive the screws in firmly, but avoid overtightening.

4. Attach the Shelves

Carefully place the shelves on top of the installed brackets. Ensure they are level and properly aligned.

5. Secure the Shelves (Optional)

For added stability, you can optionally secure the shelves to the brackets using screws. This is especially recommended for heavier shelves.

Adding Finishing Touches

Your floating shelves are now ready to adorn your walls! Here are some final tips:

  • Arrange your belongings artfully. Consider the height and weight distribution of your items.
  • Use decorative boxes or baskets to conceal clutter.
  • Add lighting to highlight your shelves and create a dramatic effect.

Congratulations! You've now mastered the art of building and customizing your own floating shelves. Enjoy the satisfaction of transforming your space into a stylish and functional haven. With your newfound DIY skills, the possibilities are endless!