How to build a wooden gun box with locks for safety

How to build a wooden gun box with locks for safety

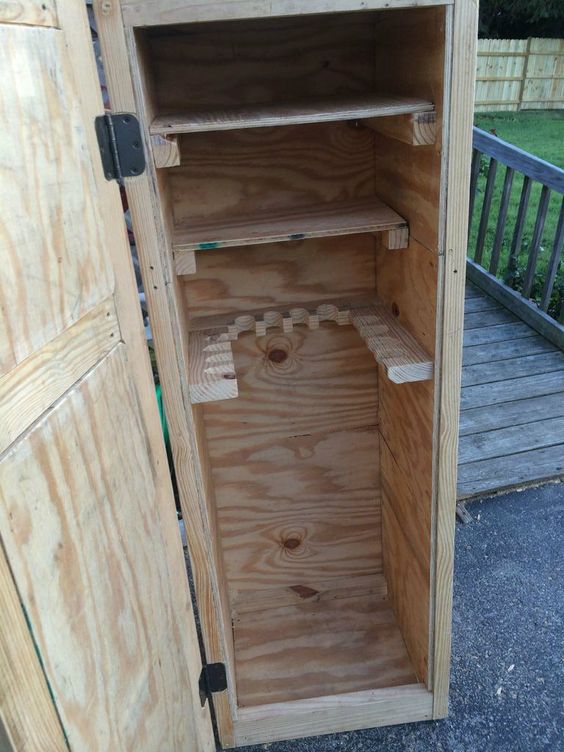
Building a Wooden Gun Box with Locks for Safety: A DIY Guide

Hey there, fellow firearm owners! Ever feel like your guns aren't stored as securely as they could be? Maybe you're looking for a more stylish and personalized way to keep your firearms locked up tight. Well, you're in luck! Today, we're diving into building your own wooden gun box with locks, a project that combines both practical safety and a touch of DIY pride.

Why Build a Wooden Gun Box?

You might be thinking, "Why go through the effort of building a box when I can just buy one?" And you'd be right, there are tons of great gun safes and boxes on the market. But there are a few reasons why building your own might be the way to go:

  • Customization: You can tailor the box to fit your exact needs, whether it's size, wood type, or even adding special compartments for accessories.
  • Personal Touch: Building something yourself adds a unique element of pride and satisfaction, not to mention a cool conversation starter.
  • Cost-Effective: You can often save money by building a gun box yourself, especially if you already have some woodworking skills.
  • A Sense of Accomplishment: There's nothing quite like the feeling of building something useful and knowing you did it with your own hands.

Planning Your Wooden Gun Box

Before you jump into the woodshop, it's essential to have a solid plan. Here's what you need to consider:

1. Size and Dimensions:

Measure the length, width, and height of the firearms you'll be storing. Add some extra room for padding and any accessories. Consider the number of guns you want to store, and if you need separate compartments for different types of weapons.

2. Wood Choice:

Choose a strong, durable wood like oak, maple, or walnut. These woods are resistant to scratches and dings. Pine or plywood can be used, but they might not be as sturdy.

3. Locks and Hinges:

You'll need sturdy locks to secure your firearms. Consider a high-quality padlock or a key lock with a strong deadbolt. Choose hinges that are strong enough to support the weight of the box and its contents.

4. Padding and Storage Options:

Think about padding options to protect your firearms from bumps and scratches. Foam, felt, or even a layer of fabric can be great choices. If you're adding compartments, you'll need dividers to create sections.

Building the Wooden Gun Box: A Step-by-Step Guide

Alright, let's get our hands dirty! Here's a breakdown of the construction process:

1. Cut the Wood Pieces:

Using a saw, carefully cut the wood to the dimensions you've planned. Make sure your cuts are accurate and straight for a well-fitting box.

2. Construct the Base and Sides:

Glue and screw the sides of the box to the base. Ensure everything is square and flush for a secure fit. You might need clamps to hold the pieces together while the glue dries.

3. Create the Top:

Cut the top panel for the box, and attach it using hinges. Choose hinges that are strong enough to support the weight of the top and its contents.

4. Install the Locks:

This is where the security element comes in. Attach the lock plates to the box, ensuring they're securely fastened. Make sure you've chosen locks that are appropriate for the size and weight of your box.

5. Add Interior Padding:

This is where you can customize your gun box. Line the interior with your chosen padding material. Use glue, staples, or screws to secure the padding.

6. Incorporate Compartments (Optional):

If you're adding compartments, now is the time to build them. Cut dividers and attach them to the interior using glue and screws. You can create compartments for specific types of firearms or accessories.

7. Finishing Touches:

Sand the wood to smooth out any rough edges. Apply your chosen finish, whether it's stain, paint, or a clear sealant. Let the finish dry completely before handling the box.

Safety Considerations

Remember, a gun box is only as safe as the locks and hinges used. Here are some crucial safety points to keep in mind:

  • Strong Locks: Invest in high-quality locks that are difficult to pick or pry open. Consider using a combination of locks, like a padlock and a key lock, for added security.
  • Secure Hinges: Use robust hinges that are properly attached and cannot be easily removed or forced open.
  • Hidden Mounting Points: For an extra layer of security, consider mounting the box to a solid surface, like a wall or floor, using screws or bolts that are hidden from view.
  • Fire Safety: If possible, store the box in a cool, dry place away from direct sunlight and heat sources.

Making it Your Own: Personalizing Your Gun Box

Now that you have a solid gun box, it's time to personalize it! Here are some ideas:

  • Inlay Work: Add intricate details using wood inlays, creating patterns or designs on the surface of the box.
  • Carving: Showcase your artistic side by carving your initials, a family crest, or a decorative motif on the box.
  • Burned Designs: Add a unique touch with wood burning techniques, creating personalized artwork on the surface.
  • Metal Accents: Enhance the box's aesthetic with brass or copper accents like corner plates, hinges, or lock plates.

Final Thoughts

Building your own wooden gun box with locks is a rewarding project that combines safety and personalization. By carefully planning, using quality materials, and paying attention to security details, you can create a sturdy and secure storage solution for your firearms. Remember, a well-built gun box is not just about aesthetics â€" it's about keeping your firearms safe and out of the wrong hands. So, grab your tools, choose your wood, and get ready to build a secure and personalized gun box you can be proud of!

Diy wooden gun cabinet: how to add extra security

Diy wooden gun cabinet: how to add extra security

DIY Wooden Gun Cabinet: Adding Extra Security

You’ve poured your heart and soul into crafting a beautiful wooden gun cabinet, but don’t stop there! Security is paramount when storing firearms, and even the most aesthetically pleasing cabinet needs additional safeguards to ensure peace of mind. Here's how to take your DIY gun cabinet from good to great with a few strategic security upgrades.

Reinforce the Doors

The doors are the first line of defense against unauthorized access. Here's how to beef them up:

Solid Core Construction

If your doors are made from thin plywood, consider replacing them with solid core doors. This single step dramatically increases the resistance to prying and drilling.

Metal Reinforcements

Install metal plates or strips on the inside of the doors, especially around hinges and lock mechanisms. These reinforcements prevent easy damage and offer additional strength.

Heavy-Duty Hinges

Replace standard hinges with heavy-duty, non-removable hinges. These are significantly harder to pry apart and offer a much stronger hold.

Upgrade the Lock

The lock is the final barrier, so choosing a robust one is essential:

Pick-Resistant Lock

A standard lock is easily defeated by skilled thieves. Invest in a pick-resistant lock, preferably one with a high-security cylinder. Look for locks with features like anti-bumping pins and anti-drill plates.

Multiple Locking Points

Don’t rely on a single lock. Install a multiple-locking system with at least two separate locking points. This significantly increases the time and effort required to break in.

Security Plate

A security plate adds an extra layer of protection around the lock. It’s a simple, yet effective deterrent against drilling and prying attacks.

Additional Security Measures

Beyond the doors and lock, consider these additional measures:

  • Motion Sensor Alarm: A motion sensor alarm placed inside the cabinet can trigger a loud alarm and alert you to any unauthorized access.
  • Concealed Security Cameras: Install a discreet camera inside the cabinet to record any potential intruders. The footage can provide valuable evidence in case of theft.
  • Secure Anchoring: Bolting the cabinet to the floor or wall prevents it from being easily removed.
  • Concealed Lighting: Install motion-activated lighting inside the cabinet. This can deter potential thieves and make it harder for them to work in the dark.

Remember:

While these security measures provide extra protection, they are not foolproof. It’s always advisable to store your firearms responsibly, including following local laws and regulations. Consider investing in a gun safe if your needs require an even higher level of security.

How to create a sleek in-wall gun cabinet with safety features

How to create a sleek in-wall gun cabinet with safety features

Building a Sleek and Secure In-Wall Gun Cabinet

Concealing your firearms while ensuring their safety is paramount for any gun owner. An in-wall gun cabinet seamlessly blends into your home's décor while providing a secure storage solution. This article will guide you through the process of building a sleek and secure in-wall gun cabinet, equipping you with the knowledge to create a safe haven for your firearms.

Planning Your In-Wall Gun Cabinet

Before you start swinging a hammer, meticulous planning is key. Begin by deciding on the location, size, and design of your in-wall cabinet.

Location Selection

Choose a location that is easily accessible for you but out of reach for children and unauthorized individuals. A closet, an unused corner, or behind a wall-mounted artwork could serve as ideal spots.

Size and Design Considerations

Determine the number of firearms and accessories you need to store. Measure the chosen location accurately and consider the thickness of the wall to ensure the cabinet fits. Choose a design that complements your home's aesthetic â€" a sleek, modern cabinet with a flush-mounted door can blend seamlessly with your décor.

Materials and Tools

You'll need:

  • Sturdy plywood or MDF (medium-density fiberboard) for the cabinet structure
  • Strong hinges and a quality lock with a keyed or electronic mechanism
  • Wood screws, drywall screws, and construction adhesive
  • A drill, saw, level, and measuring tape
  • Paint or stain to match your décor

Building the Cabinet

With the plan in place, let's build your cabinet.

Cabinet Construction

Cut the plywood or MDF to the desired size for the cabinet's sides, top, bottom, and shelves. Secure these pieces together using wood glue and screws to create a sturdy frame. Attach the lock mechanism to the door, ensuring smooth opening and closing.

Installation

Cut an opening in the wall to accommodate the cabinet's dimensions. Secure the cabinet frame to the wall studs using drywall screws and construction adhesive for added support. If you are installing the cabinet in a wall without studs, use specialized wall anchors to ensure stability.

Securing the Cabinet

A sleek exterior doesn't mean compromising safety. Let's focus on locking mechanisms and additional security features.

Choosing the Right Lock

Invest in a high-quality lock with a keyed or electronic mechanism. Consider a combination lock for additional security. Opt for a lock with a strong latch and a reinforced door for added protection against forced entry.

Additional Safety Features

For enhanced security, consider:

  • Motion sensors: Trigger an alarm or alert your smartphone if unauthorized movement is detected near the cabinet.
  • Magnetic door contacts: Sound an alarm if the cabinet is opened without authorization.
  • Concealed cameras: Provide visual evidence of any tampering attempts.

Finishing Touches

Now that the structure is built, it's time to make your in-wall gun cabinet aesthetically pleasing.

Finishing and Customization

Apply a coat of paint or stain to match your surrounding décor. Use a high-quality finish to protect the cabinet from moisture and wear. To further integrate the cabinet, use a similar material to the surrounding wall to create a seamless look.

Safety Considerations

Remember that safety is paramount when it comes to firearms. Always follow these precautions:

  • Store your firearms unloaded and separate from ammunition.
  • Use cable locks to secure your firearms inside the cabinet.
  • Keep the key or code for your cabinet in a secure location, out of reach of unauthorized individuals.
  • Regularly inspect your cabinet for any signs of damage or wear, and replace any components as needed.

Conclusion

By meticulously planning, constructing, and securing your in-wall gun cabinet, you'll create a safe and discreet storage solution for your firearms. Remember that proper security measures are essential to protect your firearms and prevent unauthorized access. Enjoy peace of mind knowing your firearms are safely tucked away within the walls of your home.

Diy wooden gun box with secure, adjustable compartments

Diy wooden gun box with secure, adjustable compartments

Building a Secure and Adjustable Wooden Gun Box

A gun box is an essential piece of equipment for any responsible gun owner. Not only does it keep your firearms safe from unauthorized access, but it also provides a dedicated space for storage and organization. While there are plenty of gun boxes available on the market, building your own wooden gun box allows you to customize the design, materials, and features to perfectly meet your needs. This guide will walk you through the steps of constructing a secure and adjustable wooden gun box with compartments that can be easily adapted to accommodate different firearm sizes.

Materials and Tools

Before you begin, gather the necessary materials and tools:

  • Wood (pine, oak, or other hardwood for the box construction)
  • Plywood (for the shelves and dividers)
  • Wood glue
  • Wood screws
  • Finish nails (for attaching the lid)
  • Wood stain or paint (optional)
  • Clear coat (optional)
  • Hinges (for the lid)
  • Lock and key (for added security)
  • Measuring tape
  • Pencil
  • Circular saw or table saw
  • Jigsaw
  • Drill
  • Clamps
  • Sandpaper
  • Safety glasses
  • Dust mask

Planning the Design

Start by sketching out your desired gun box design. Consider the dimensions, the number of compartments, and the placement of the lock. Measure your firearms to determine the necessary space for each compartment. You can opt for a simple rectangular box or explore more intricate designs with multiple levels or angled compartments.

Cutting the Wood

Using your measurements, cut the wood for the box using a circular saw or table saw. Pay close attention to precision, as any inaccuracies will affect the final assembly. Cut the sides, top, and bottom of the box, and if needed, cut the dividers for the compartments. Remember to leave extra wood for the lid and any other features you want to incorporate.

Creating Adjustable Compartments

To create adjustable compartments, use plywood to construct shelves and dividers that can be moved or removed as needed. Cut the plywood pieces to the desired sizes and attach them to the sides of the box using wood glue and screws. You can use adjustable shelf pins or metal brackets to create easily movable compartments.

Assembling the Box

Assemble the box by joining the sides, top, and bottom using wood glue and screws. Clamp the pieces together and allow the glue to dry completely. Once dry, sand the exterior of the box to create a smooth finish.

Adding the Lid and Lock

Cut the lid from the remaining wood, ensuring a snug fit. Attach the lid to the box using hinges. You can use finish nails or screws to secure the hinges in place. Install the lock and key, making sure it is securely fastened to the lid. Choose a robust lock that is difficult to pick or break.

Finishing Touches

Once the box is assembled, you can apply a stain or paint to enhance the look and provide a protective layer. Choose a finish that complements your existing décor or matches your personal preferences. You can also apply a clear coat to protect the wood from moisture and scratches.

Customization and Safety

The beauty of building your own gun box is the opportunity for customization. You can add features like a felt lining for extra protection, a foam insert to cradle your firearms, or a locking mechanism that requires a key and a combination. Remember that safety is paramount. Always lock your gun box and keep it out of reach of children. Properly securing your firearms is crucial to prevent accidents and unauthorized access.

Building a secure and adjustable wooden gun box can be a rewarding project. You can enjoy the satisfaction of crafting a personalized storage solution for your firearms, ensuring their safety and organization while adding a touch of craftsmanship to your home.

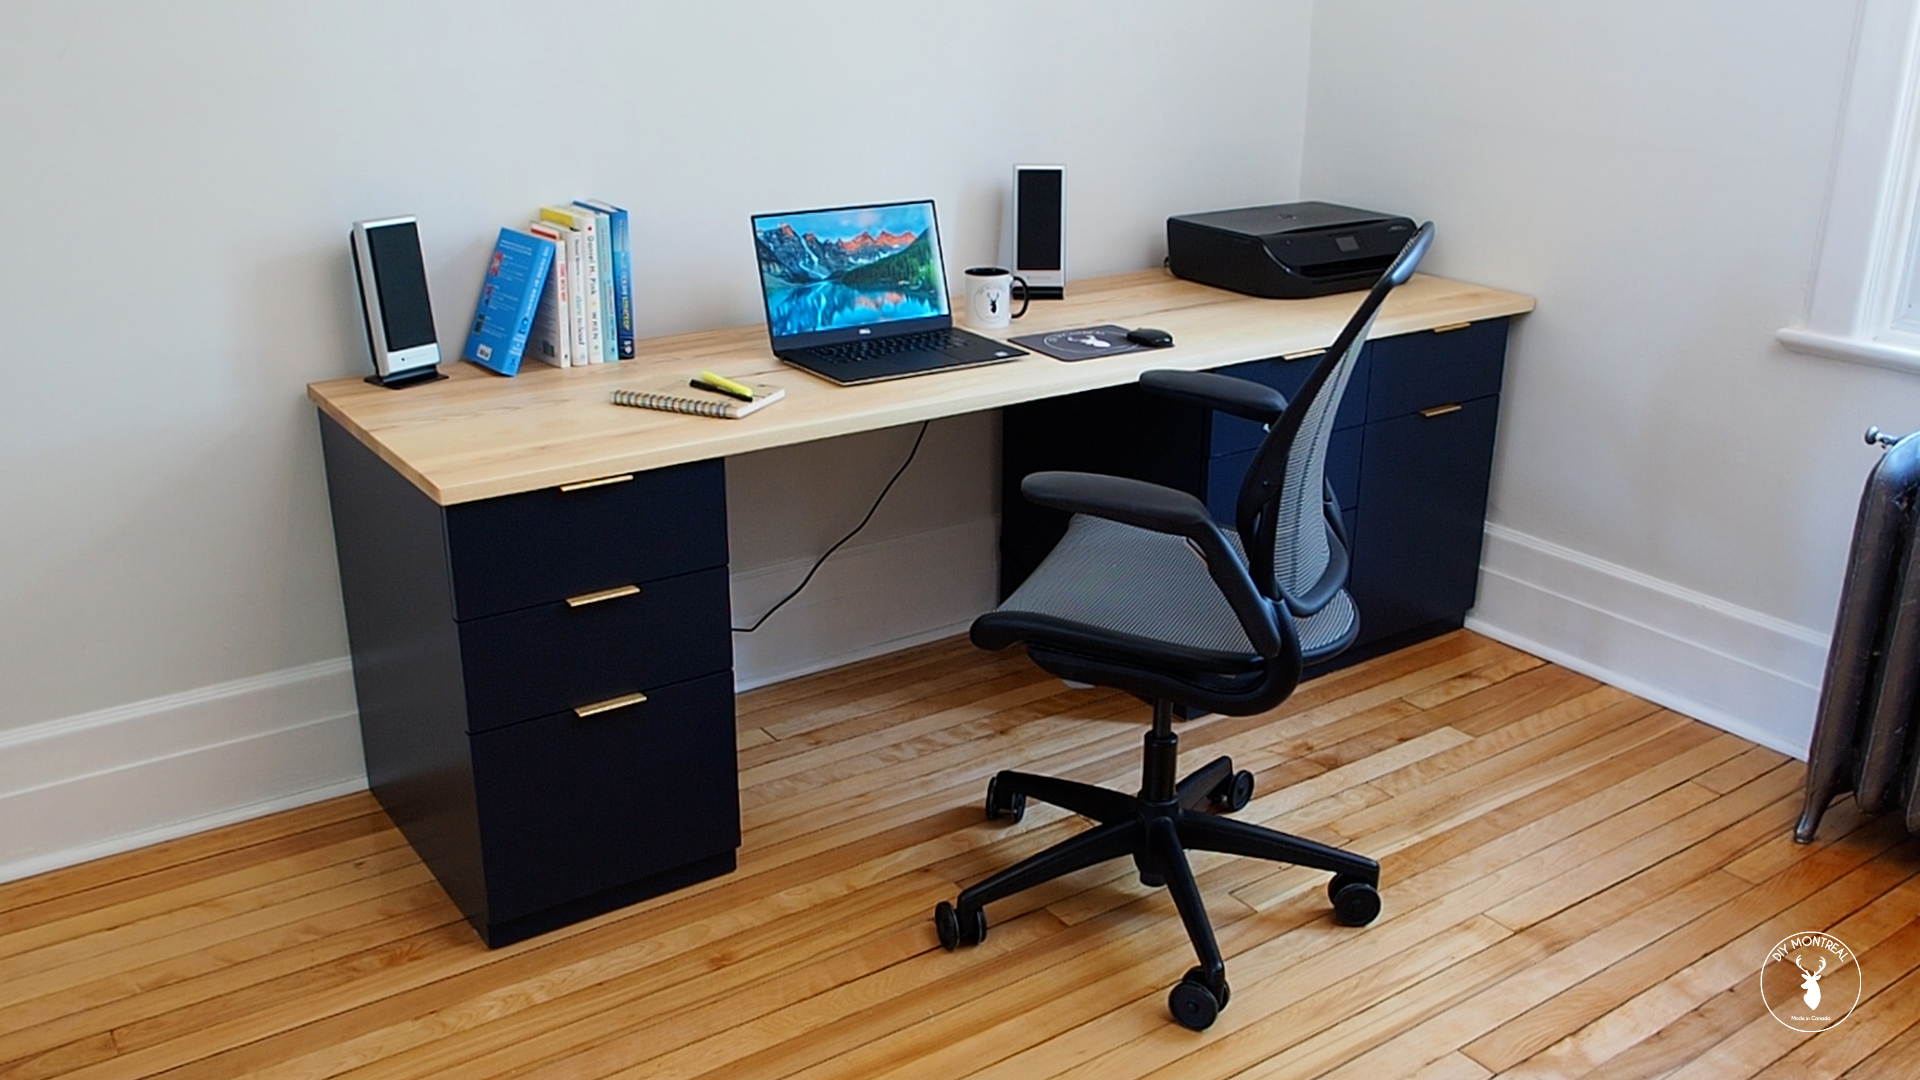
How to build a wooden desk with hidden cable channels

How to build a wooden desk with hidden cable channels

Building a Wooden Desk with Hidden Cable Channels: A Step-by-Step Guide

Tired of tangled cords and messy wires cluttering your workspace? You’re not alone. A clean, organized setup can drastically improve your productivity and overall enjoyment of your home office. One of the best ways to achieve this is by building a desk with hidden cable channels, which effectively conceals your wires and cables, creating a sleek and minimalist look.

While it might sound intimidating, building a wooden desk with hidden cable channels is a doable project for anyone with basic woodworking skills. This guide will walk you through the entire process, from planning to finishing, providing clear instructions and tips to help you succeed.

Planning Your Desk

Before you grab your tools and head to the lumberyard, take some time to carefully plan your desk design. This will save you headaches later on and ensure that your desk is both functional and aesthetically pleasing.

Determine Your Needs and Dimensions

Consider the following factors when deciding on your desk's dimensions:

  • Workspace size: How much space do you need for your laptop, monitor, keyboard, and other peripherals?
  • Storage requirements: Do you need drawers, shelves, or other storage solutions?
  • Available space: How much room do you have in your office or home for your desk?
  • Personal preferences: Do you prefer a traditional desk design or something more modern?

Once you have a good understanding of your needs, sketch out your design on paper. You can also use free online design tools to create a 3D model of your desk, helping you visualize the final product.

Choosing Materials

The choice of wood will significantly impact the look and durability of your desk. Here are some popular options:

  • Hardwoods: Oak, maple, cherry, and walnut offer strength, durability, and beautiful grain patterns. They are typically more expensive than softwoods.
  • Softwoods: Pine, fir, and cedar are less expensive and easier to work with. They are less durable than hardwoods but can be suitable for desk projects.
  • Plywood: Plywood is an excellent choice for desktops due to its stability and affordability.
  • MDF: Medium-density fiberboard (MDF) is a cost-effective material, but it can be less durable than plywood.

For the hidden cable channels, you can use plywood, MDF, or even plastic molding. Choose a material that complements your desk's design and offers the desired level of durability.

Designing the Cable Channels

There are a few different ways to design your cable channels:

  • Under the desktop: A channel running along the underside of the desktop provides easy access to wires and cables. This is a simple and effective solution, especially for managing cables from power strips and computer monitors.
  • Inside the legs: Running channels through the desk legs provides a more discreet and integrated approach to hiding cables. However, this requires careful planning and execution.
  • Behind the desk: If you have space behind the desk, consider creating a channel in the back panel to hide cables from the wall. This approach is particularly useful for managing power cords and internet cables.

Think about the types of devices you'll be using on your desk and where their cords will be plugged in. Plan the channel layout accordingly to accommodate all your needs.

Building Your Desk

Once you've finalized your design and gathered your materials, it's time to start building your desk! Here's a general overview of the steps involved:

Cutting and Assembling the Desk Frame

  • Cut the wood: Measure and cut the wood for the desk frame (legs, top rails, bottom rails) using a saw, preferably a table saw for precision.
  • Join the frame: Assemble the desk frame using wood glue and screws or dowels. You can choose a joinery technique based on your skill level and the design you prefer.
  • Add bracing: Reinforce the frame with additional bracing, especially if you're using a large desktop. Braces will prevent the frame from warping or sagging over time.

Creating the Cable Channels

  • Cut channel pieces: Measure and cut the wood or molding for your cable channels. If you're using plywood or MDF, cut the pieces using a jigsaw or table saw. For plastic molding, use a miter saw or handsaw.
  • Attach channels: Attach the channel pieces to the underside of the desktop, inside the legs, or behind the desk using wood glue and screws. Ensure the channels are securely attached to prevent them from coming loose.
  • Add access points: Cut access points for your cables in the desired locations. Use a hole saw to create smooth openings.

Building and Attaching the Desktop

  • Cut the desktop: Measure and cut your chosen wood for the desktop. You can use a table saw, circular saw, or jigsaw, depending on your toolset and the material you're using.
  • Sand and finish: Sand the desktop smooth using progressively finer grit sandpaper. Apply a wood finish like oil, stain, or paint, based on your preferences. Let it dry completely.
  • Attach the desktop: Place the desktop on the assembled frame. Ensure the desktop aligns correctly with the frame and sits flush. Secure the desktop to the frame using screws or brackets.

Finishing Touches

Once you've completed the construction, take some time to add finishing touches to make your desk truly unique. This could include:

  • Installing drawer slides: If you're adding drawers to your desk, install drawer slides and assemble the drawers.
  • Adding a back panel: Install a back panel to cover the rear of the desk and enhance its appearance.
  • Attaching a cable management system: Install a cable management system inside the channels to keep your wires organized and tidy.
  • Adding a desk lamp: Choose a desk lamp that provides adequate lighting for your workspace and complements your desk design.
  • Organizing your desk: Use desk organizers, trays, and other accessories to keep your workspace tidy and efficient.

Enjoy Your New Desk

Congratulations! You've built a stunning wooden desk with hidden cable channels that will enhance your workspace and improve your productivity. Now, sit back, admire your creation, and enjoy the benefits of a clean, organized desk.

Remember, building a desk can be a fun and rewarding project. Don't be afraid to experiment and personalize your desk to make it truly your own. Enjoy the process, and have fun!

Diy guide: how to build a wooden gun cabinet for maximum storage

Diy guide: how to build a wooden gun cabinet for maximum storage

DIY Guide: Building a Wooden Gun Cabinet for Maximum Storage

Hey there, gun enthusiasts! Tired of your firearms cluttering up your space? Want a safe, secure, and stylish way to store your collection? Well, you're in the right place! This DIY guide will walk you through building a wooden gun cabinet that maximizes storage and adds a touch of class to your home.

Getting Started: What You'll Need

First things first, let's gather our materials. You'll need the following:
  • Lumber: Choose a sturdy hardwood like oak, maple, or cherry for durability and a nice finish. You'll need 1x4s, 1x6s, and 1x8s for the frame, shelves, and doors.
  • Plywood: ½ inch thick plywood for the back panel and shelves.
  • Hardware: Hinges, door handles, shelf supports, a lock, and screws.
  • Wood glue: For strong, lasting joints.
  • Wood filler: For patching any minor imperfections.
  • Sandpaper: A variety of grits for smoothing the wood before finishing.
  • Finish: Stain, paint, or oil based sealant for a beautiful and protective coating.
  • Safety gear: Safety glasses, gloves, and dust mask.
  • Power tools: Table saw, miter saw, drill, and sander.
  • Hand tools: Hammer, screwdriver, measuring tape, level, pencil, and a chisel (optional).

Designing Your Dream Cabinet

Before we get into the construction, let's plan out the layout. Consider the following:
  • Size: Measure the space where you want the cabinet. How many guns do you need to store? What other items will you put in it?
  • Style: Do you want a traditional, modern, or rustic look?
  • Features: Do you want adjustable shelves? A built-in drawer? A magazine rack?
  • Security: How strong of a lock do you need? Will you add additional security features like an alarm?

Sketching it Out

Once you have a general idea, draw a simple sketch of your cabinet. This will help you visualize the layout and figure out the dimensions of the various parts. Don't worry if you're not an artist, just a rough drawing will do!

Building the Cabinet: Step by Step

Okay, now let's get our hands dirty and build that cabinet! Here's a breakdown of the process:

Building the Frame

  • Cut the pieces for the frame using your table saw or miter saw. Make sure your cuts are precise and at 90-degree angles.
  • Assemble the frame using wood glue and screws. Use a level to make sure the frame is square and plumb.
  • Once the glue is dry, reinforce the frame with additional screws or even by adding corner braces for added strength.

Installing the Back Panel and Shelves

  • Measure and cut the back panel from plywood. Attach it to the frame using wood glue and brads.
  • Measure and cut the shelves to fit the cabinet. Make sure they are level and secure.
  • For adjustable shelves, consider using shelf supports and metal pins. These allow you to easily change the shelf height.

Making the Doors

  • Measure and cut the door panels from plywood. You can use multiple panels for larger doors.
  • Create a rabbet on the edges of the door panels using a table saw or router. This creates a groove that will hold the door stiles and rails.
  • Cut the stiles and rails to size and fit them into the rabbet. Make sure they are flush with the door panel.
  • Glue and screw the stiles and rails to the panel.

Finishing Touches

  • Sand the entire cabinet using sandpaper of progressively finer grits to smooth out any rough surfaces.
  • Fill any holes or imperfections with wood filler.
  • Sand the filler smooth after it dries.
  • Apply a stain, paint, or sealant to the cabinet. Make sure to follow the manufacturer's instructions for application and drying times.
  • Install the hinges, door handles, and lock on the doors.
  • Add any decorative features like moldings or trim.
  • Let everything dry thoroughly before loading your firearms into the cabinet.

Safety First: Security and Locking Mechanisms

Now, let's talk about safety! A gun cabinet is meant to keep your weapons secure, so make sure you choose a reliable lock. Here are some things to consider:
  • Lock Type: Key lock, combination lock, or electronic lock? Each has its own pros and cons.
  • Lock Strength: A sturdy lock is crucial! Choose a lock that's hard to pick or break.
  • Additional Security: You can add extra security features like a locking hasp, a bolt-down system, or even an alarm system.

Tips for Success

Here are a few extra tips to make your DIY gun cabinet project even more successful:
  • Plan Ahead: Carefully measure and plan out your design before you start cutting wood.
  • Use Quality Lumber: Invest in good quality hardwood for a durable and beautiful cabinet.
  • Be Patient: Building a cabinet takes time. Don't rush the process or try to cut corners.
  • Don't be Afraid to Ask for Help: If you're not comfortable with any step of the process, ask a friend or family member who has experience with woodworking.
  • Have Fun!: This is a great project to showcase your skills and create something you can be proud of.

Conclusion

There you have it, a step-by-step guide to building your own wooden gun cabinet! With a little time, effort, and a passion for woodworking, you can create a safe, secure, and stylish storage solution for your firearms. Remember to always prioritize safety and choose high-quality materials and hardware. Happy building!

Diy guide to building a wooden desk with a sliding mechanism

Diy guide to building a wooden desk with a sliding mechanism

Building a Wooden Desk with a Sliding Mechanism: A DIY Guide

Transform your workspace with a sleek and functional wooden desk that features a hidden sliding mechanism. This DIY project offers a unique blend of aesthetics and practicality, allowing you to create a desk that adapts to your needs. Whether you're a seasoned woodworker or just starting your DIY journey, this guide will walk you through every step, from planning to installation.

Planning and Design

Before you dive into the construction, it's crucial to plan out the design of your desk. Consider your space, the intended use, and the desired aesthetic. You'll need to decide on the dimensions of the desk, the size of the sliding section, and the materials you'll use.

1. Determine Dimensions

Measure the space where you plan to place the desk to determine its overall length and width. Now, decide on the size of the sliding section. This could be a drawer for storage, a keyboard tray, or a dedicated area for your laptop. Keep in mind that the sliding mechanism needs to be smooth and stable, so it's best to choose a size that's manageable and won't put too much stress on the system.

2. Select Materials

Choose high-quality plywood or solid wood for the desk surface and frame. Consider the wood's weight, durability, and aesthetic appeal. For the sliding mechanism, opt for smooth-running metal slides or wooden drawer runners.

Materials and Tools

Gather the following materials and tools to ensure a successful build.

1. Materials

  • Plywood or solid wood for the desk top and frame
  • Metal slides or wooden drawer runners
  • Screws, nails, and wood glue
  • Wood filler
  • Paint or stain (optional)

2. Tools

  • Circular saw or table saw
  • Drill with various bits
  • Screwdriver
  • Tape measure
  • Level
  • Sandpaper
  • Clamps
  • Safety glasses and gloves

Building the Desk Frame

The desk frame provides the foundation for your sliding mechanism. Start by cutting the wood to size for the frame's legs, top rails, and bottom rails.

1. Cut Frame Pieces

Using a circular saw or table saw, accurately cut the wood to your pre-determined dimensions. Ensure the cuts are precise and square. Use a measuring tape and a pencil to mark the wood for accurate cutting.

2. Assemble the Frame

Join the frame pieces using screws, nails, or a combination of both. Pre-drill holes for screws to prevent wood splitting. Make sure the frame is square and level before securing it permanently.

Constructing the Sliding Section

The sliding section is the heart of this project. It's what will move smoothly in and out of the desk.

1. Cut the Sliding Section

Cut the wood to size for the sliding section, ensuring it fits within the frame and allows for a smooth glide. If you're using a drawer runner system, ensure the wood dimensions align with the runner's specifications.

2. Attach the Slides

If using metal slides, attach them to the underside of the sliding section using screws. Drill pilot holes to avoid splitting the wood. Ensure the slides are securely fastened and aligned correctly.

3. Install the Drawer Runners

If you're opting for wooden drawer runners, install them according to the manufacturer's instructions. Typically, the runners are secured to the sliding section and the frame. Make sure the runners are aligned properly to prevent binding or uneven sliding.

Finishing Touches

After the frame and sliding section are assembled, give your desk the finishing touches it deserves.

1. Sanding and Filling

Sand the entire desk, including the frame and sliding section, to smooth out any rough edges and create a consistent finish. Fill any gaps or imperfections with wood filler, let it dry completely, and sand it smooth.

2. Painting or Staining

Apply your chosen paint or stain. For a natural look, use a wood stain that complements the wood's grain. If you prefer a more modern aesthetic, consider painting the desk in a solid color. Apply multiple thin coats for an even and durable finish.

3. Attach the Desk Top

Once the finish is dry, attach the desk top to the frame. Consider using screws or glue for a secure bond. Ensure the top is level and flush with the frame.

Testing and Enjoying your Desk

Once your desk is assembled, test the sliding mechanism to ensure it moves smoothly and without any binding. Adjust the slides or runners as needed until the movement is effortless. Congratulations, you've built a functional and beautiful desk that's sure to enhance your workspace!